
I still remember the morning I opened my kitchen cabinet and three Tupperware lids tumbled onto my feet. That was my wake-up call. Between raising two teenagers and trying to maintain some semblance of order in our home, my kitchen had become a catch-all for everything from expired spice bottles to recipe cards I’d printed “just in case.”
If you’re reading this, I’m guessing you’ve had your own Tupperware lid moment. The good news? You don’t have to live with kitchen chaos forever. After years of trial and error, I’ve developed a system that actually works – and more importantly, stays working.
Stage 1: Foundation – Understanding Your Why and How
Before you touch a single spatula or open one cabinet, you need to get clear on why you’re doing this and how you actually live—Stage 1 sets the mental foundation that makes everything else possible.
Why Your Kitchen Deserves Better
Your kitchen isn’t just where you cook; it’s the heart of your home. When it’s cluttered and chaotic, that stress radiates throughout your entire day. I’ve seen this in my own life and heard it from countless people who’ve used my organizing methods.
A clutter-free kitchen creates a calmer, more functional space that reduces decision fatigue and actually encourages better eating habits. When you can find what you need quickly, cooking becomes enjoyable instead of overwhelming. You’ll save time, money, and your sanity by reducing waste and eliminating those frustrating duplicate purchases.
But here’s what I learned the hard way: decluttering isn’t just about throwing things away. It’s about creating a space that supports how you live, not how you think you should live.
Setting Your Kitchen Vision
Before you touch a single item, I want you to pause and really think about your dream for this space. Consider how you actually use your kitchen versus how you want to use it. Are you someone who loves elaborate weekend cooking projects, or do you need quick weeknight solutions? Do you bake with your kids, or is your oven mainly for reheating leftovers?
The way you cook, store and use the kitchen – affects what goes and what stays. There’s no judgment here – just honesty. Once I gave up my fantasy self on the kitchen and accepted – my kitchen became so much more functional.
The Mental Framework That Changes Everything
Here’s what I’ve learned: successful decluttering isn’t about having the perfect storage system. It’s about asking yourself the right questions. I use these two sets of questions for every single item I encounter.
Practical Assessment Questions:
- Would I buy this again if I didn’t already own it?
- When was the last time I used this?
- If this broke, would I fix it or replace it?
- Do I have something else that does the same thing?
- Where would I naturally look for this item?
Emotional and Lifestyle Questions:
- Does this make me happy or add value to my cooking experience?
- Am I keeping this out of guilt or obligation?
- How many of these do I really use at one time?
- Is this something I could borrow if needed?
These questions have saved me from keeping so many “just in case” items that were really just taking up valuable space.
Stage 2: Choose Your Decluttering Strategy
With your vision clear and decision-making framework in place, it’s time to pick your approach—Stage 2 gives you two proven strategies to choose from based on your personality and situation.
Strategy #1: The Three-Layer Decluttering Approach
Best for: People who feel overwhelmed by big messes, those who have tried the “pull everything out” method and failed, busy families who need to see quick progress to stay motivated, and anyone who gets paralyzed by too many decisions at once.
I’ve tried the “pull everything out at once” method, and let me tell you – it’s overwhelming and usually ends with everything shoved back where it started. Instead, I use a layered approach that builds momentum and confidence.
Layer 1: The Obvious Wins
Start here because these decisions are easy and you’ll see immediate progress. Remove anything that’s clearly trash, broken items you’ve been meaning to fix for months, and items that obviously don’t belong in the kitchen. I found Christmas decorations in my pantry last spring – apparently, I’d stashed them there during a quick cleanup and forgotten about them entirely.
Layer 2: Surface Decluttering
This is where you’ll see the biggest visual impact. Start with your countertops because clear surfaces make everything feel calmer immediately. Remove non-essential small appliances – if you haven’t used that juicer in the past year, it’s taking up prime real estate.
Here’s where I need to talk about something that might seem small but makes a huge difference: recipe clutter. You know what I mean – those printed recipes stuffed in drawers, recipe cards scattered in junk drawers, old cookbooks you never open, and screenshots filling up your phone’s photo gallery.
I used to have recipes everywhere. Torn-out magazine pages, handwritten family recipes on index cards, bookmarked websites I’d forgotten about, and photos of recipes from friends’ social media posts. Finding anything specific was impossible, and I’d end up ordering takeout because I couldn’t locate the simple pasta recipe I knew I had somewhere.
This is why I created OrganizEat in the first place. I needed a way to keep all my recipes in one searchable place without the physical clutter. The app lets you snap photos of handwritten family recipes, save recipes from websites and social media, and organize everything into folders that make sense for how you cook.
What I love most is that it extracts text from photos, so my grandmother’s handwritten cookie recipe is now searchable and readable, but I still have the original image for sentimental value. When you’re decluttering your physical recipe collection, you can keep what truly matters while making it infinitely more functional.
Layer 3: Storage Deep Dive
This is where the real transformation happens. Tackle cabinets and drawers one at a time – completely empty them, clean thoroughly, then sort everything before putting anything back. How many of each item do you actually need and how many of them do you use? Group similar items together and apply what I call the 80/20 rule: keep what you use 80% of the time easily accessible.
Strategy #2: Zone-by-Zone Strategy
Best for: People who prefer systematic, comprehensive approaches, those with larger kitchens or extensive collections, perfectionists who want to tackle everything properly the first time, and people who have dedicated time blocks (like a long weekend) to focus on organization.
Countertops: Your Daily Command Center
Keep only items you use daily visible on your counters. For most people, that’s a coffee maker, maybe a knife block, and essential oils or salt. Everything else should have a designated home in a cabinet or drawer.
I learned this lesson when I realized I was moving the same three appliances every time I wanted to prep dinner. Now those appliances live in a cabinet, and my counters are actually usable workspace.
Cabinets and Drawers: The Hidden Chaos
Remove everything completely – and I mean everything. Clean the shelves thoroughly, then sort items by frequency of use, not just by type. Your everyday dishes should be at eye level, while that fondue pot from 1987 can go on the highest shelf or better yet, find a new home entirely.
Eliminate duplicates beyond what you actually need. I kept thinking I needed backup measuring cups until I realized I was just creating more dishes to wash.
Pantry: Where Good Intentions Go to Expire
Check expiration dates ruthlessly. Spices lose their taste after a while, so your 3 years old smoked papprika and tumertic tastes bad. Throw away and if you need – buy again a small amount. Consolidate duplicates and invest in clear storage containers – being able to see what you have prevents overbuying and waste.
This is another area where organized recipes make a huge difference. When I created OrganizEat’s meal planning feature, I could actually see what ingredients I needed for the week and create a shopping list out of it. No more buying pasta for the third time because I couldn’t remember what I had planned to cook.
Refrigerator and Freezer: The Black Holes
Regular purging of expired items is non-negotiable. Organize by zones – dairy in one area, vegetables in another. Label containers with dates, and maintain visibility of all items. I use clear containers for leftovers because if I can’t see it, I forget about it, and then it becomes expensive compost.
Stage 3: Decision Making – What to Let Go
Now that you’ve surfaced the clutter using your chosen strategy, it’s time to make the hard calls—Stage 3 is where you let go of what’s just taking up space.
Dishes and Serve ware
Get rid of anything chipped, cracked, or damaged. I know you think you might need those extra coffee mugs for when you have guests, but be honest – how often does that happen? Keep what you use regularly, plus a few extras for special occasions.
Those souvenir mugs and novelty items you never reach for? They’re just taking up space that could be used for items you actually love.
Cooking Tools and Appliances
Single-use gadgets are often the biggest space wasters. If you have a multi-tool that can do the same job in a good way, let the single-use item go. That avocado slicer seemed genius at the store, but your knife works just fine.
Be honest about broken or damaged cookware, especially non-stick items that are scratched beyond repair. And if you haven’t used an appliance in six months, it’s probably time to find it a new home.
Food and Pantry Items
Expired spices lose their potency and aren’t worth keeping. Duplicate condiments and sauces multiply somehow – keep your favorites and donate the rest before they expire. And please, tackle those plastic containers without matching lids. They’re the socks of the kitchen world.
Stage 4: Organization – Creating Systems That Actually Work
With the deadweight gone, it’s time to give everything left a proper home—Stage 4 is where you build the systems that will keep your kitchen functional long-term.
Strategic Placement and Storage Solutions
Strategic placement is everything. Store items near where you use them, keep daily items at eye level, and use vertical space efficiently. Drawer dividers and clear containers aren’t just pretty – they’re functional tools that help you maintain organization.
Labels might seem excessive, but they’re game-changers, especially if other family members use the kitchen. When everyone knows where things belong, they’re more likely to put them back correctly.
Here’s something I learned from organizing my recipes digitally: good organization makes meal planning and grocery shopping so much easier. When I can see all my recipes organized by category, I can plan a week’s worth of meals in minutes. The app even generates grocery lists from my planned recipes, which eliminates the guesswork and reduces food waste.
Stage 5: Maintenance – Making It Stick Long-Term
Your kitchen looks amazing, but the real test is whether it stays that way—Stage 5 builds the habits and systems that prevent you from sliding back into chaos.
Daily and Weekly Habits for Success
The truth is, organization isn’t a one-time event – it’s an ongoing practice. But it doesn’t have to be overwhelming if you build the right daily habits.
Clean as you go, put items back where they belong immediately, and tidy your countertops each evening. These small actions prevent the big messes that make you want to give up entirely.
Monthly pantry checks catch expired items before they become science experiments, and I use these checks as opportunities to plan meals around what I already have (it’s extra useful if you meal plan on a budget). This reduces waste and saves money by using up ingredients before they expire. Seasonal deep purges keep things from getting out of hand without the pressure of constant maintenance.
Preventing Re-Accumulation
The key to preventing re-accumulation is developing a “one in, one out” mindset. When you bring home a new kitchen gadget, something else should leave. Say no to unnecessary freebies, and stop impulse buying kitchen gadgets that promise to revolutionize your cooking but end up in the back of a drawer.
Stage 6: Overcoming Challenges – The Emotional and Practical Hurdles
Even with the best intentions, you’ll hit roadblocks along the way—Stage 6 addresses the guilt, overwhelm, and other obstacles that can derail your progress.
Dealing with Guilt and Sentimental Attachments
Let’s be honest about the emotional aspects of decluttering. Guilt about getting rid of gifts is real, and the fear of needing something “someday” can paralyze decision-making. I get it – I kept a bread maker for five years because it was a wedding gift, even though I’d used it exactly twice.
Sentimental attachments are valid, but they shouldn’t dominate your functional space. For items with emotional value but no practical use, consider taking a photo before letting the item go, or keep one representative piece instead of the entire collection.
Remember that decluttering is ongoing, not a one-time perfect solution. Focus on progress, not perfection, and celebrate the small wins. Every cleared countertop and organized drawer is a victory worth acknowledging.
Implementation Tips for Long-Term Success
Work in manageable chunks – don’t try to tackle your entire kitchen in one weekend. Take before and after photos for motivation; you’ll be amazed at the transformation when you see it captured in images.
Don’t shop for organizers until after you’ve decluttered. I made this mistake early on, buying beautiful storage solutions for items I ended up donating anyway. First declutter, then organize with what you need to store.
Involve family members in the process, especially if they use the kitchen too. When everyone understands the system and contributes to maintaining it, success becomes much more sustainable.
The goal isn’t perfection – it’s creating a kitchen that supports your life instead of adding stress to it. Regular reassessment of your needs, seasonal adjustments, and continued mindful consumption will help you maintain the calm, functional space you’ve worked to create.
Your kitchen should be a place where cooking feels enjoyable, where you can find what you need quickly, and where the space itself supports your family’s rhythms and routines. It’s possible, and it’s worth the effort. Trust me – your future self will thank you every time you walk into your organized, peaceful kitchen.
Special Focus: Conquering Kitchen Paper Clutter Once and For All
Paper clutter is the silent saboteur of kitchen organization—this special section tackles the avalanche of documents, manuals, recipes, and random papers that somehow multiply in every kitchen drawer and counter.
Kitchen paper clutter is everywhere: appliance manuals, warranty cards, takeout menus, school lunch calendars, grocery lists, coupons, recipes torn from magazines, and those mysterious pieces of paper with phone numbers we can’t remember writing. The kitchen becomes a paper dumping ground because it’s the hub of daily life, but all that paper creates visual noise and makes it impossible to find what you truly need.
Sort Your Paper Collection First
Create distinct piles:
- Active papers you reference regularly (current school calendars, frequently used takeout menus)
- Important documents that require physical copies (appliance warranties, legal papers)
- Sentimental papers like handwritten family recipes or kids’ special artwork
- Discard pile for everything else (which will likely be 70% of what you find)
Digitize What Matters
After decluttering ruthlessly, digitize the keepers using your phone’s camera. Store them in organized folders where you can actually find them.
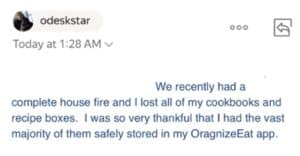
This digital backup isn’t just about convenience—it’s about protection. I once received a heartbreaking thank you note from a user who lost everything in a house fire, including all her cookbooks and recipe boxes. But because she’d digitized her most treasured recipes in OrganizEat, those family memories survived the flames.
While I originally created OrganizEat as a recipe organizing app, it works brilliantly for all kitchen-related paper clutter. The app’s photo capture and text extraction features make everything searchable:
- Appliance warranties and manuals tagged by appliance type
- Takeout menus and restaurant info with location tags
- School lunch menus and schedules
- Handwritten family recipes that preserve the original while making them searchable
You can search “warranty” to find all appliance documentation, or “pizza” to find both your homemade recipe and favorite delivery menu. More importantly, you’ll have peace of mind knowing your most important kitchen documents are safely backed up in the cloud, protected from fire, flood, or any other disaster that might strike your home.
Preventing Future Paper Accumulation
Before keeping any piece of paper, ask: “Can I find this information online?” Most appliance manuals, restaurant menus, and school calendars are available digitally. When paper is necessary, immediately photograph it and decide if you need the physical copy. Usually, the digital version is more accessible and takes up zero physical space.
Frequently Asked Questions
Ask yourself: “Would I buy this again if I didn’t already own it?” and “When did I last use this?” If you can’t remember the last time you used something or wouldn’t repurchase it, it’s time to let it go.
Build daily habits like cleaning as you go and tidying countertops each evening. Do short mini-decluttering sessions and adopt a “one in, one out” rule for new items.
Digitize everything you can for easy searching and organization, but keep original documents that require physical copies (like warranties with official seals). The key is having both accessibility and preserving what legally or sentimentally needs to stay physical.