OrganizEat is your new meal-planning app, and turn your favorite recipes into a fun and tasty meal plan. Whether you plan for a family or for one person – meal planning has never been easier!
Check us out →
Adding a recipe to the meal plan:
This tutorial is about the fully structured calendar Meal Planner of OrganizEat. If you are interested in a less structured, more flexible meal planning method, you might like “This Week” shortlist option.
There are two ways to add a recipe to your Meal Plan.
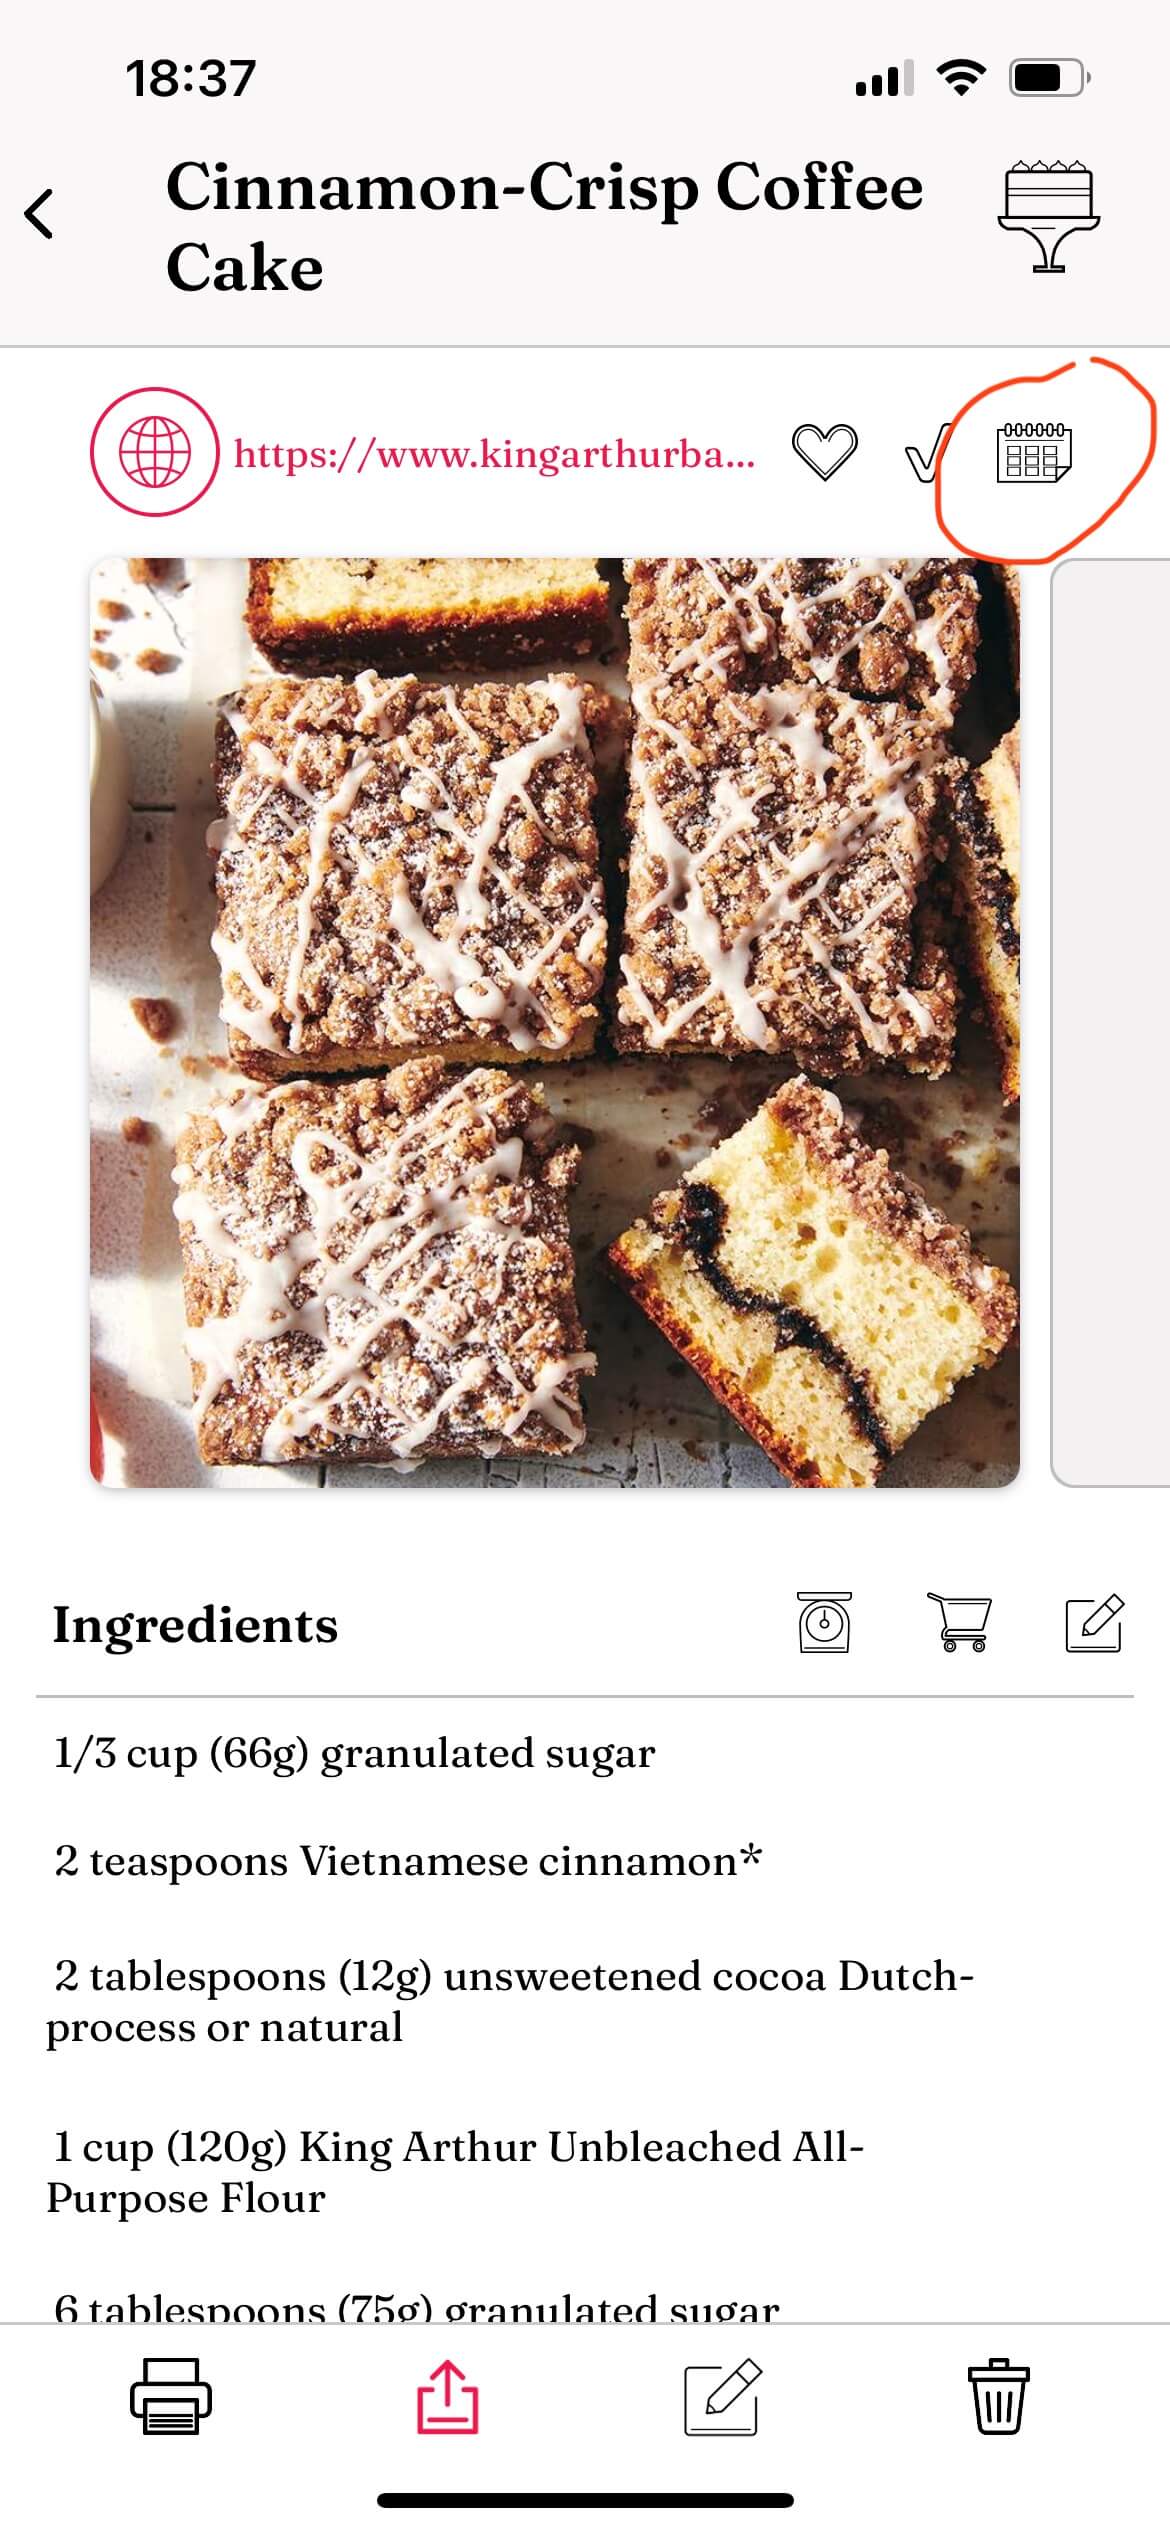
From the Recipe screen:
Open the recipe
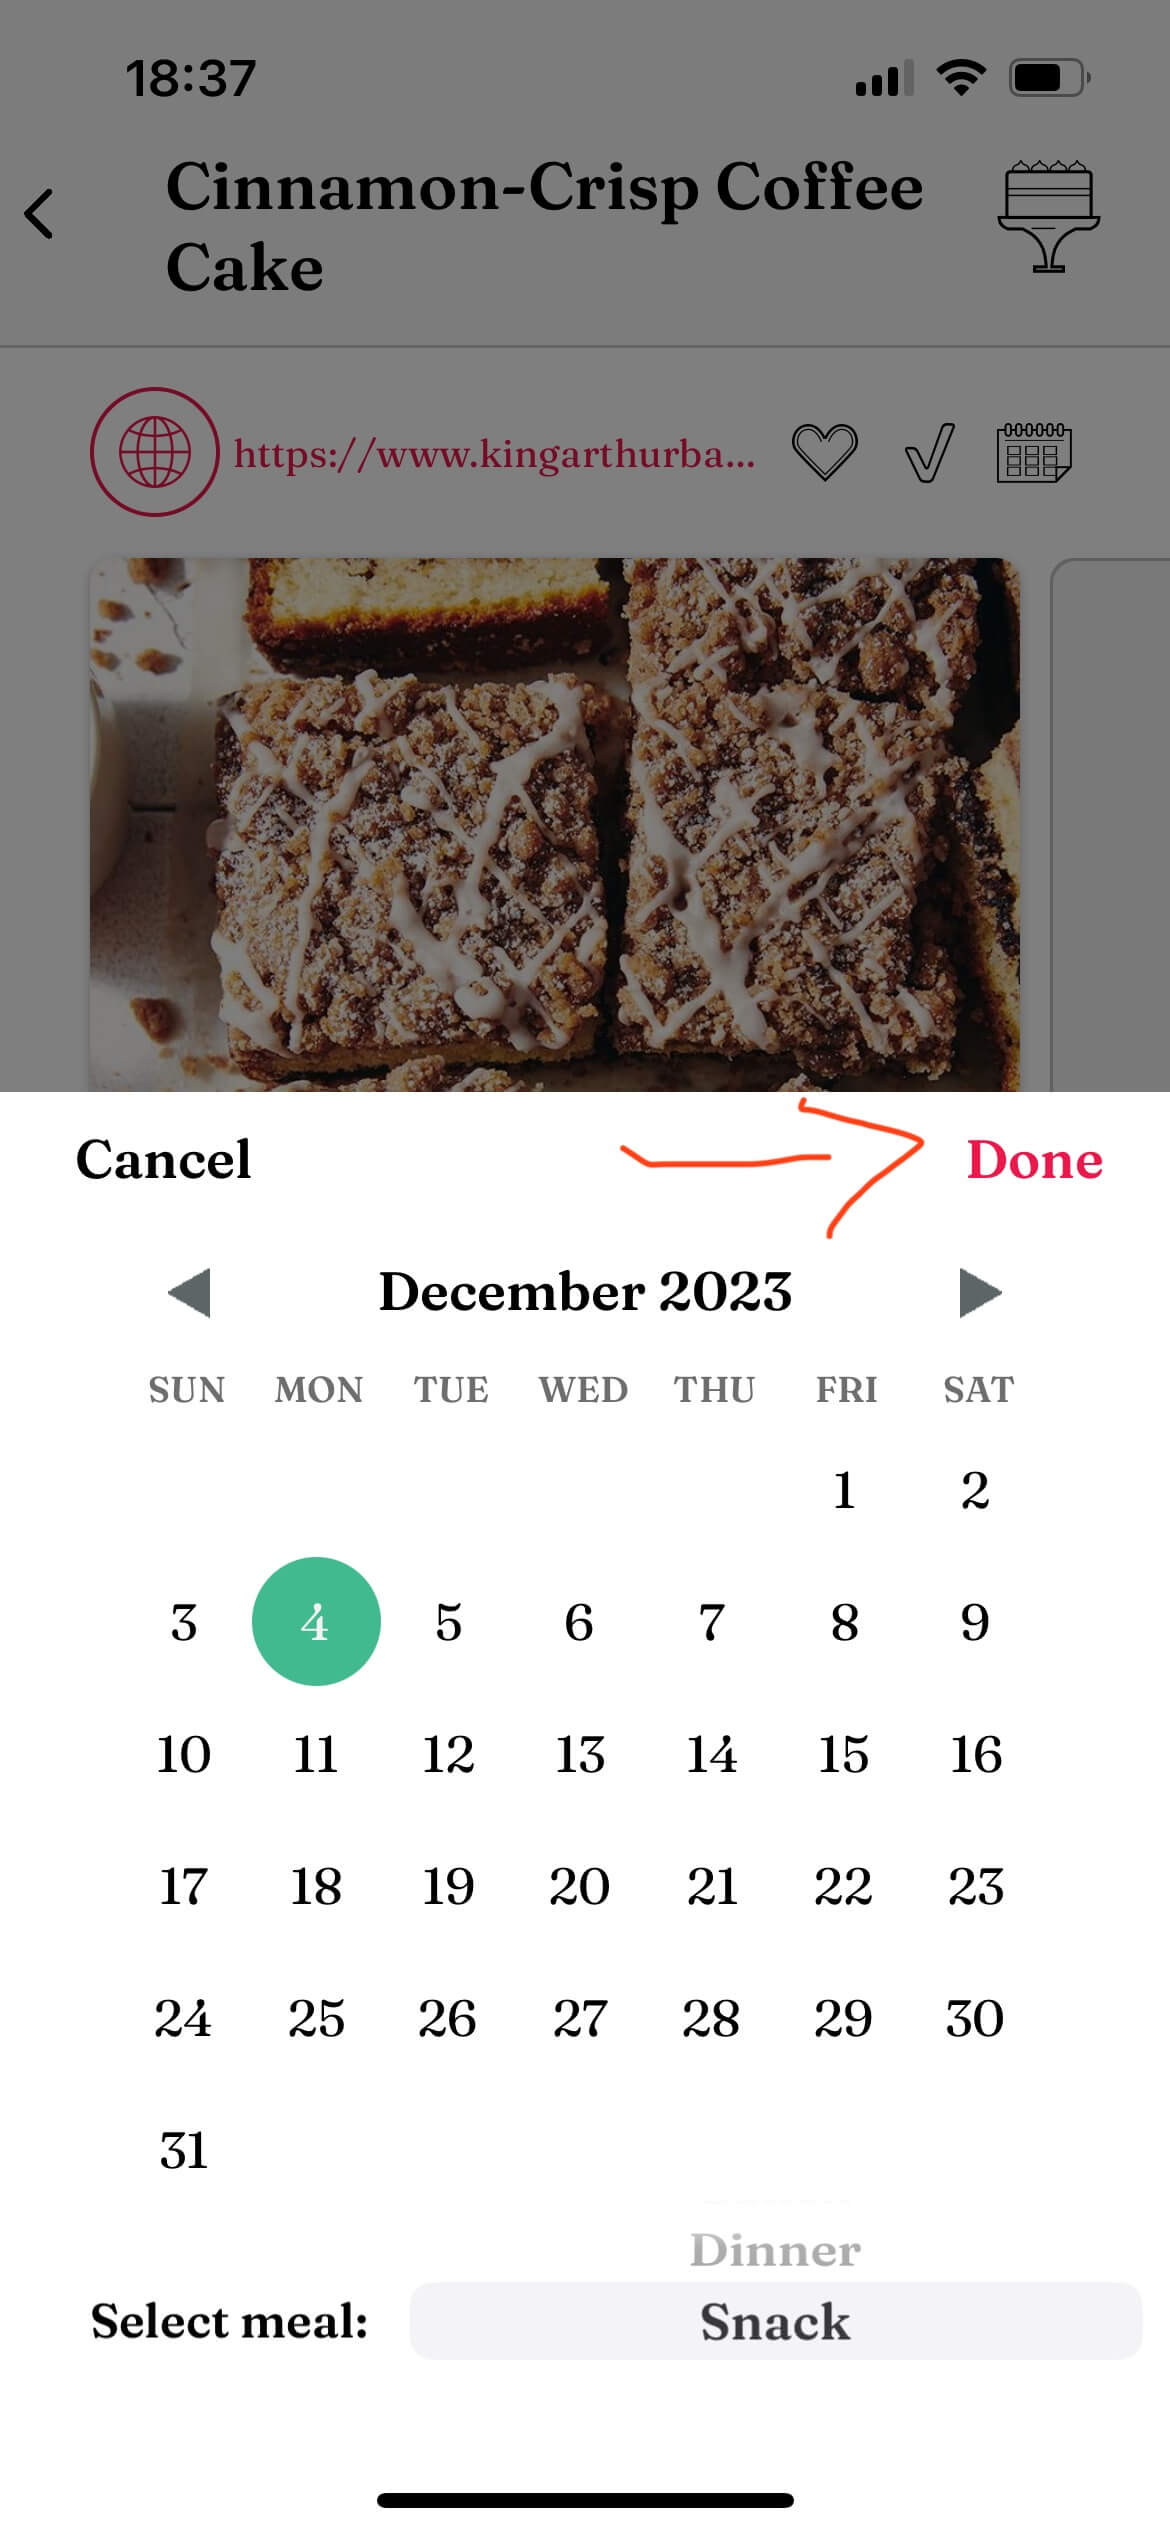
Tap on calendar icon at the top
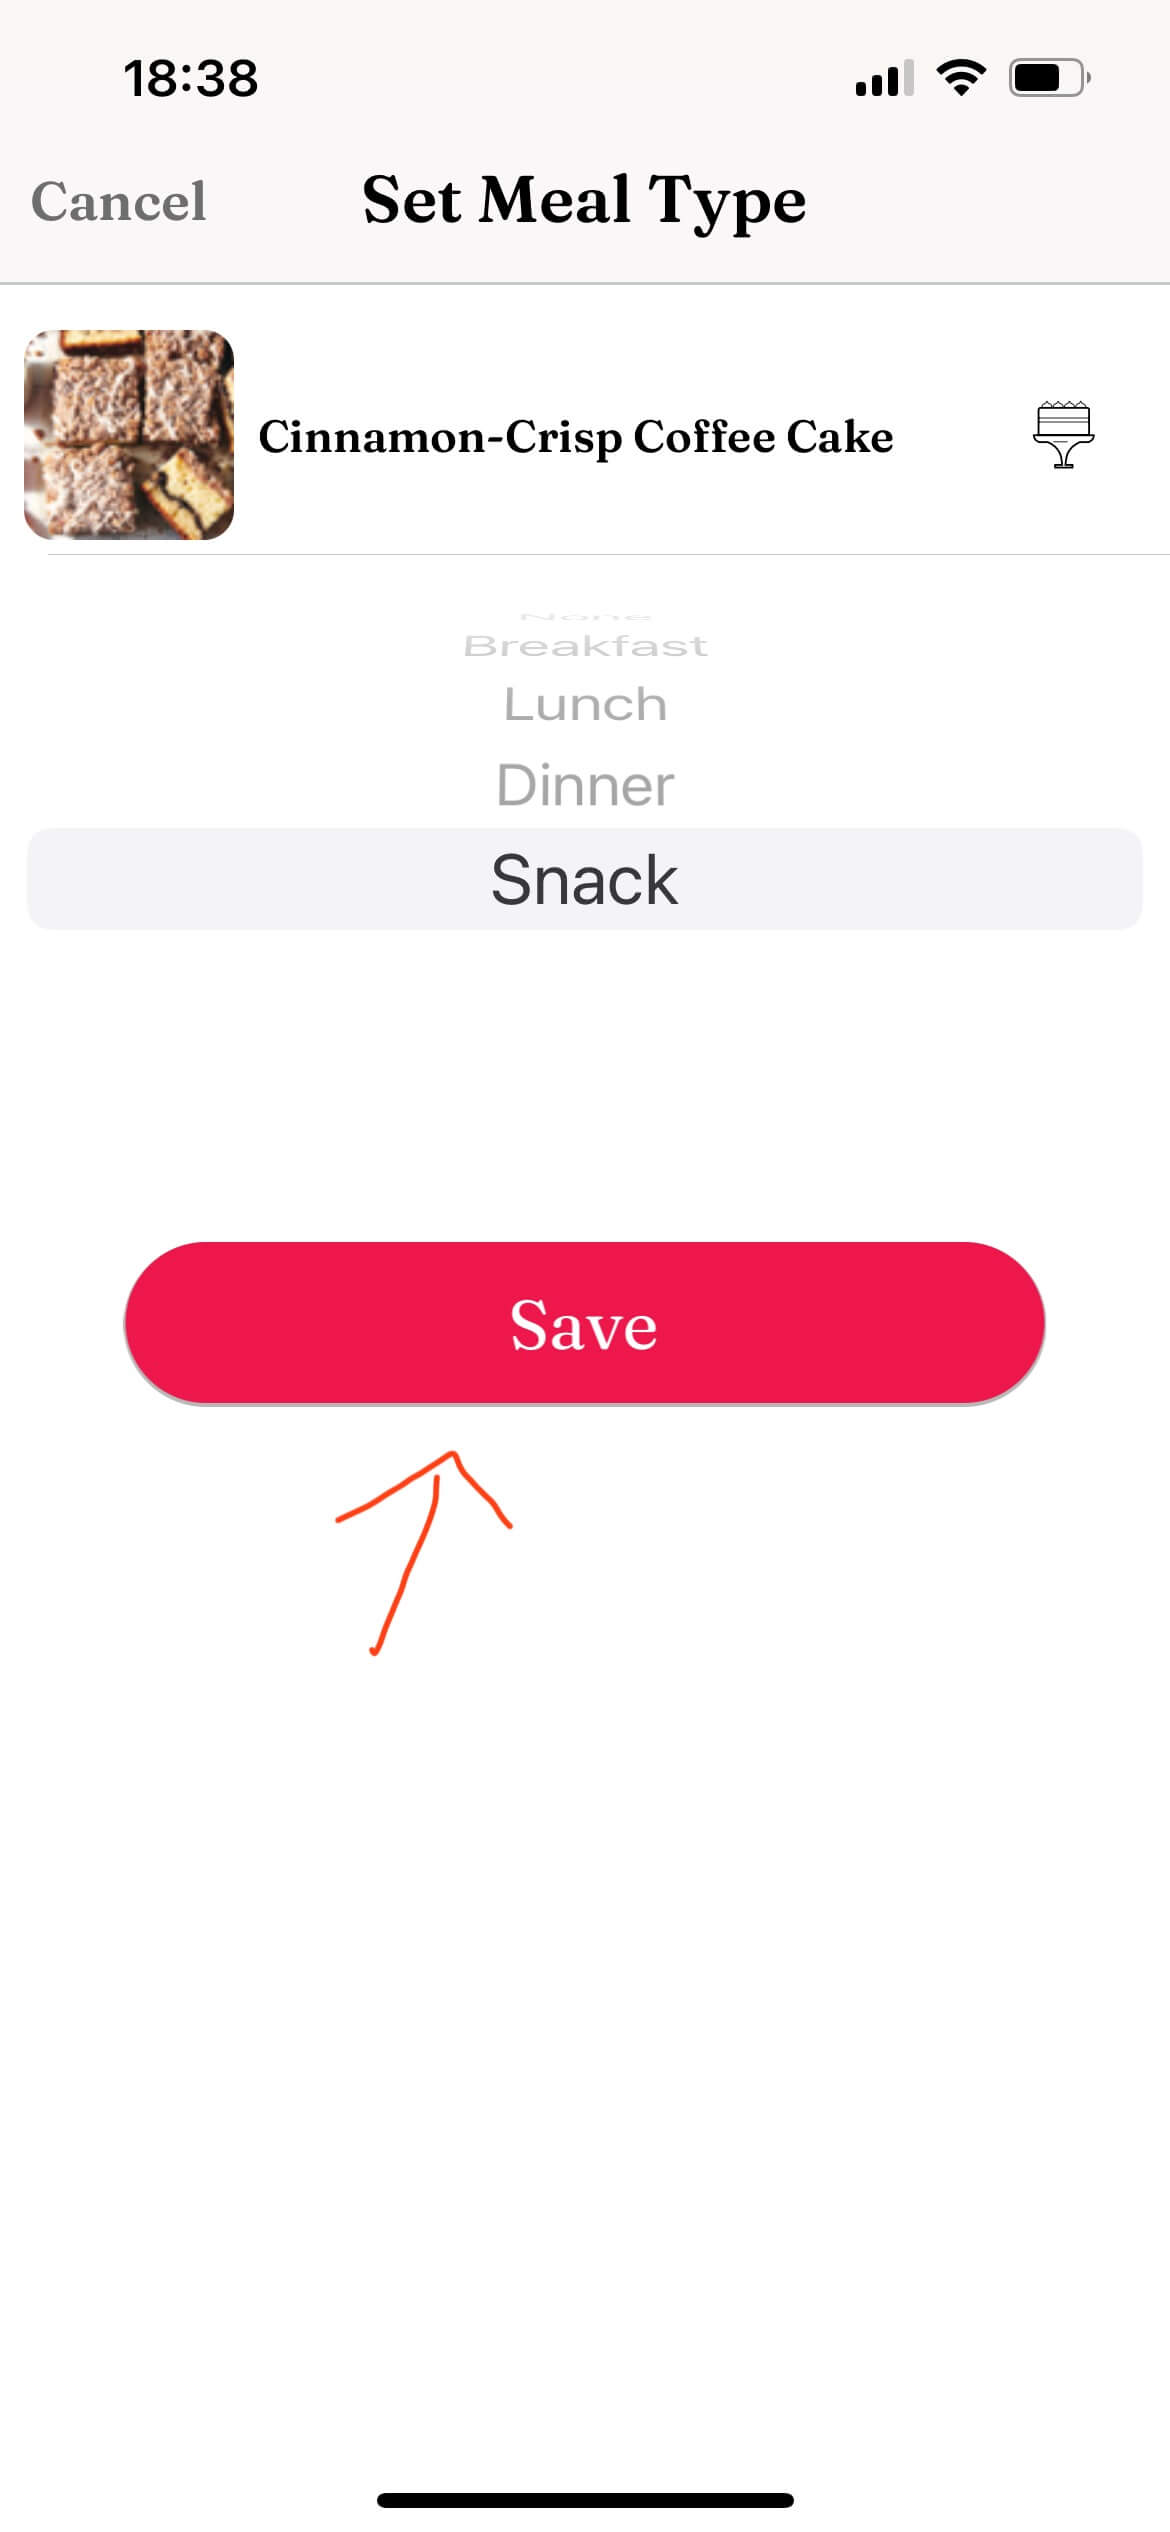
Choose a date (mandatory) and meal type (optional)
Click “Done”
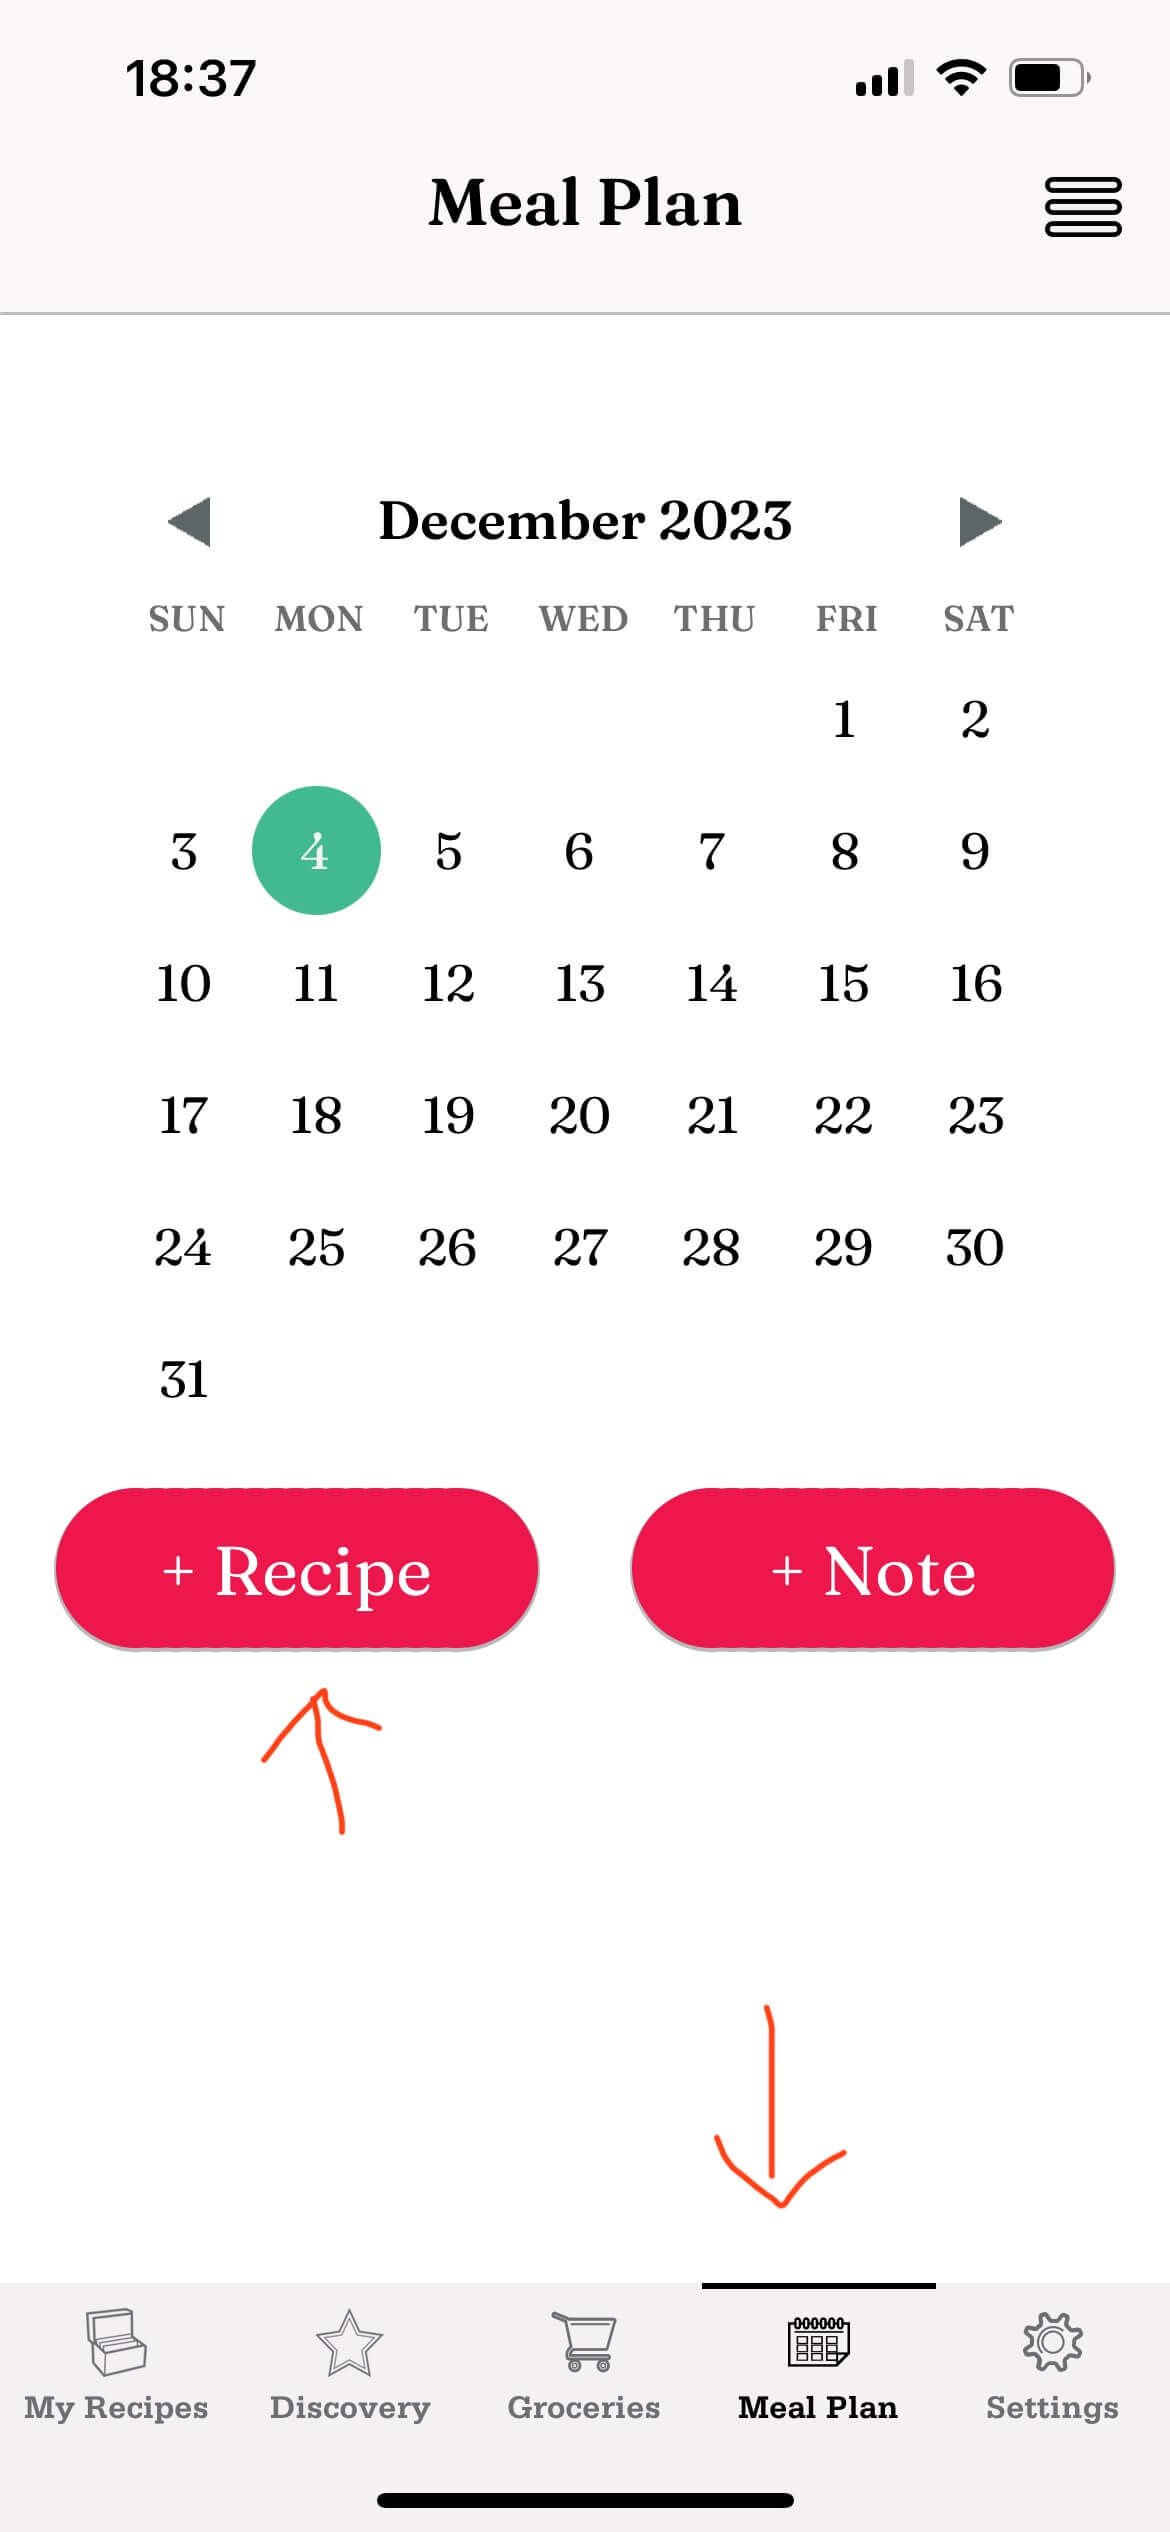
2. From the Meal Planner screen:
Open the app’s main screen
Select the“Meal Plan” tab at the bottom
Select a day in the calendar
Click on “+Add recipe”
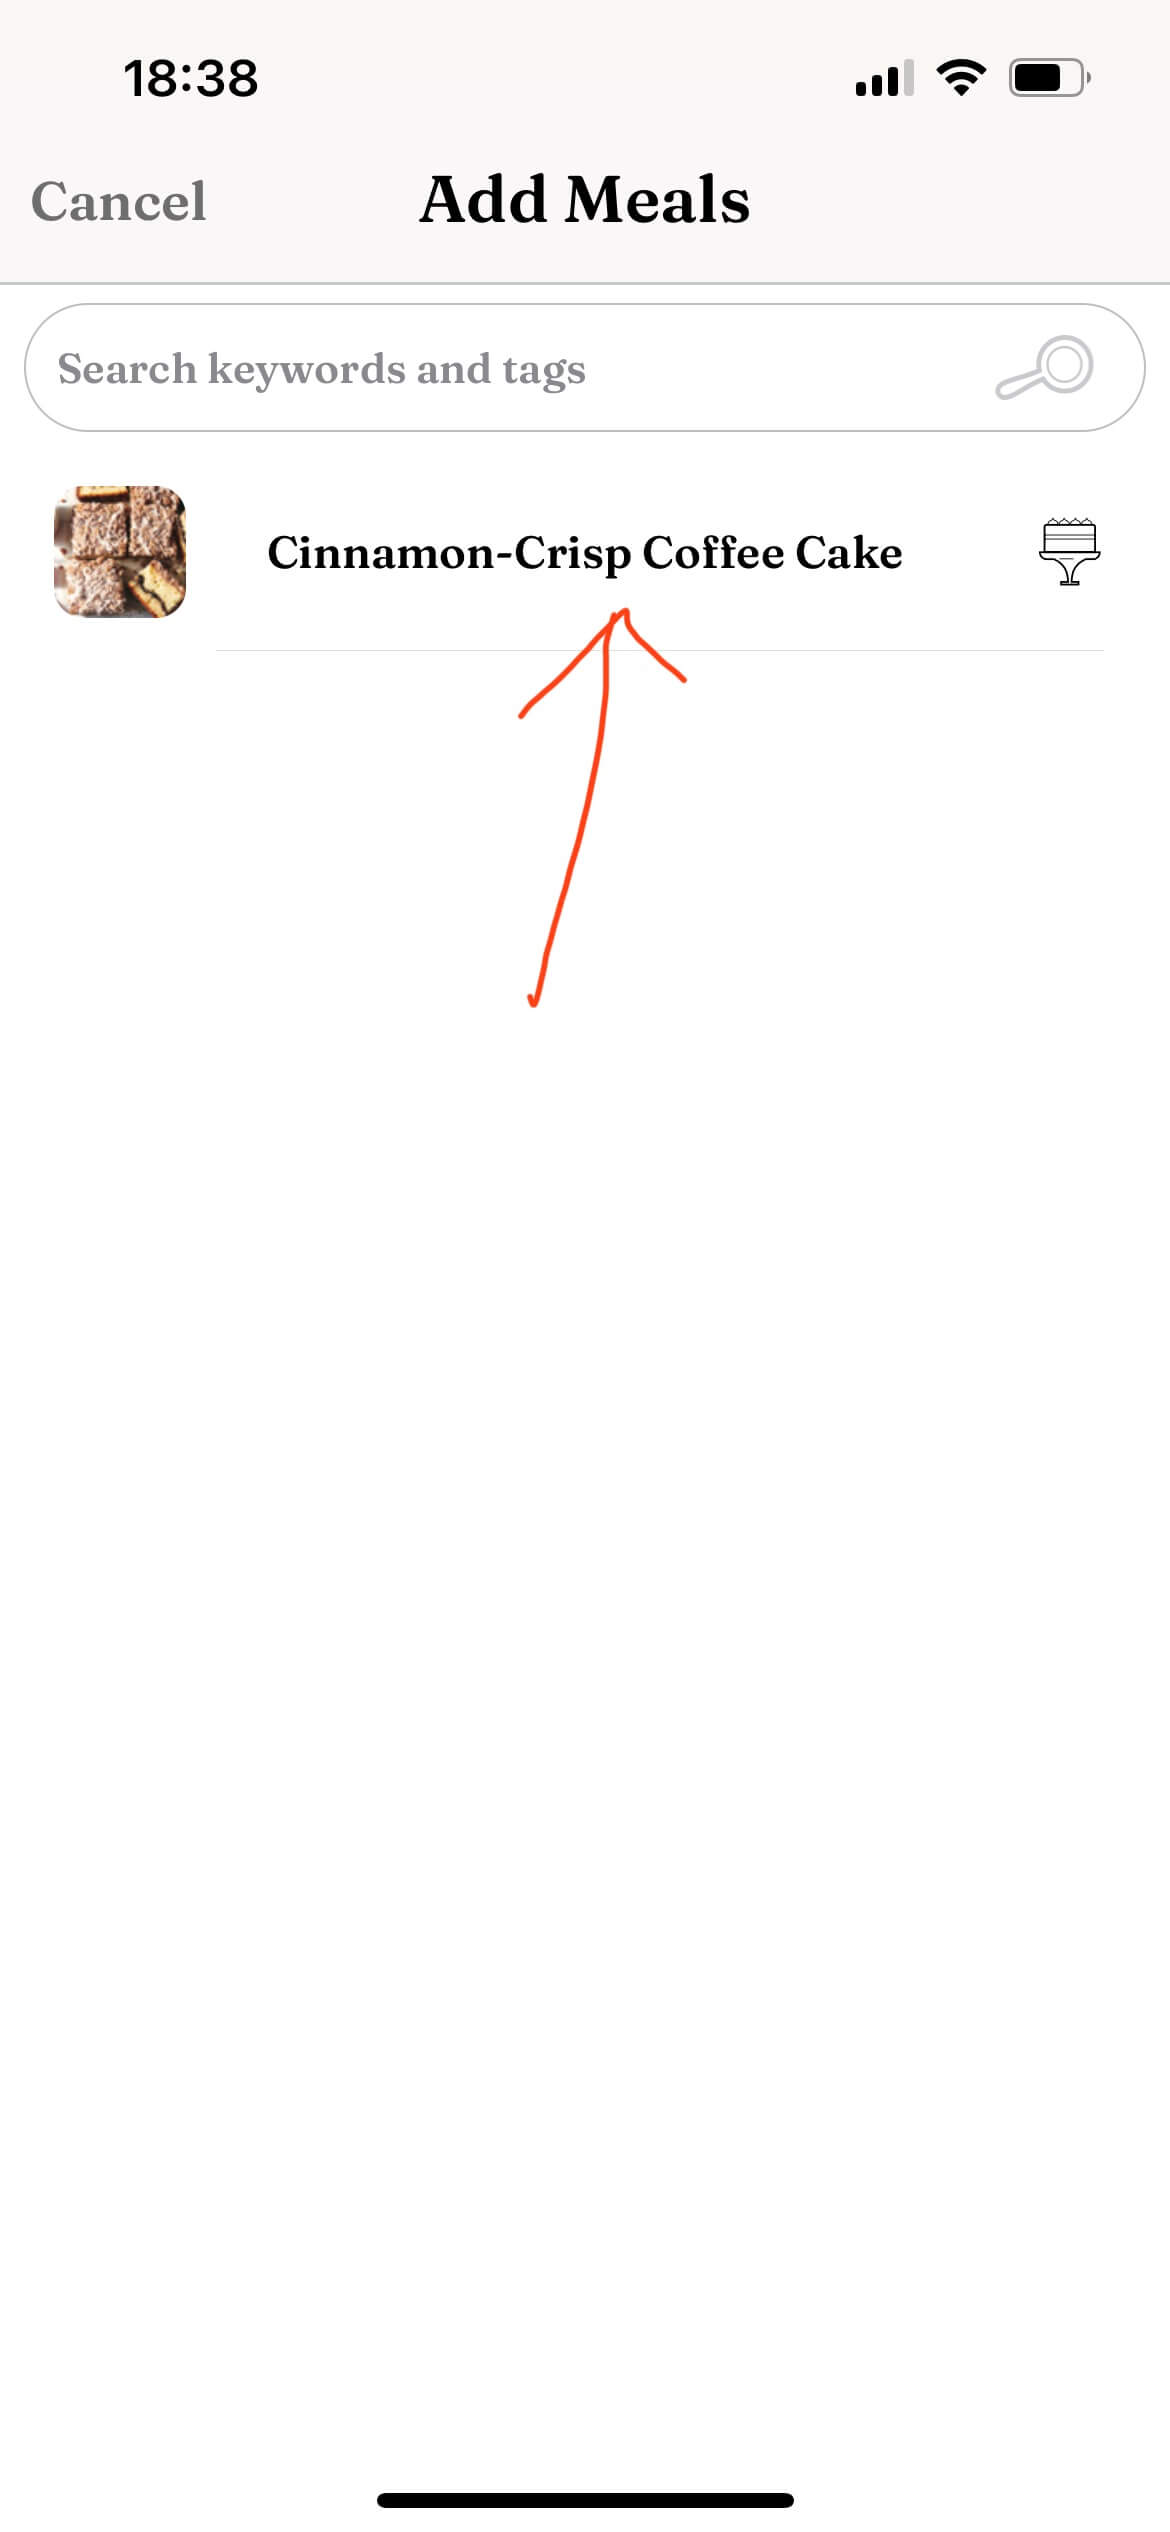
Choose the recipe (you can search for tags and keywords here..)
Select the meal type (optional)
Press “Save”
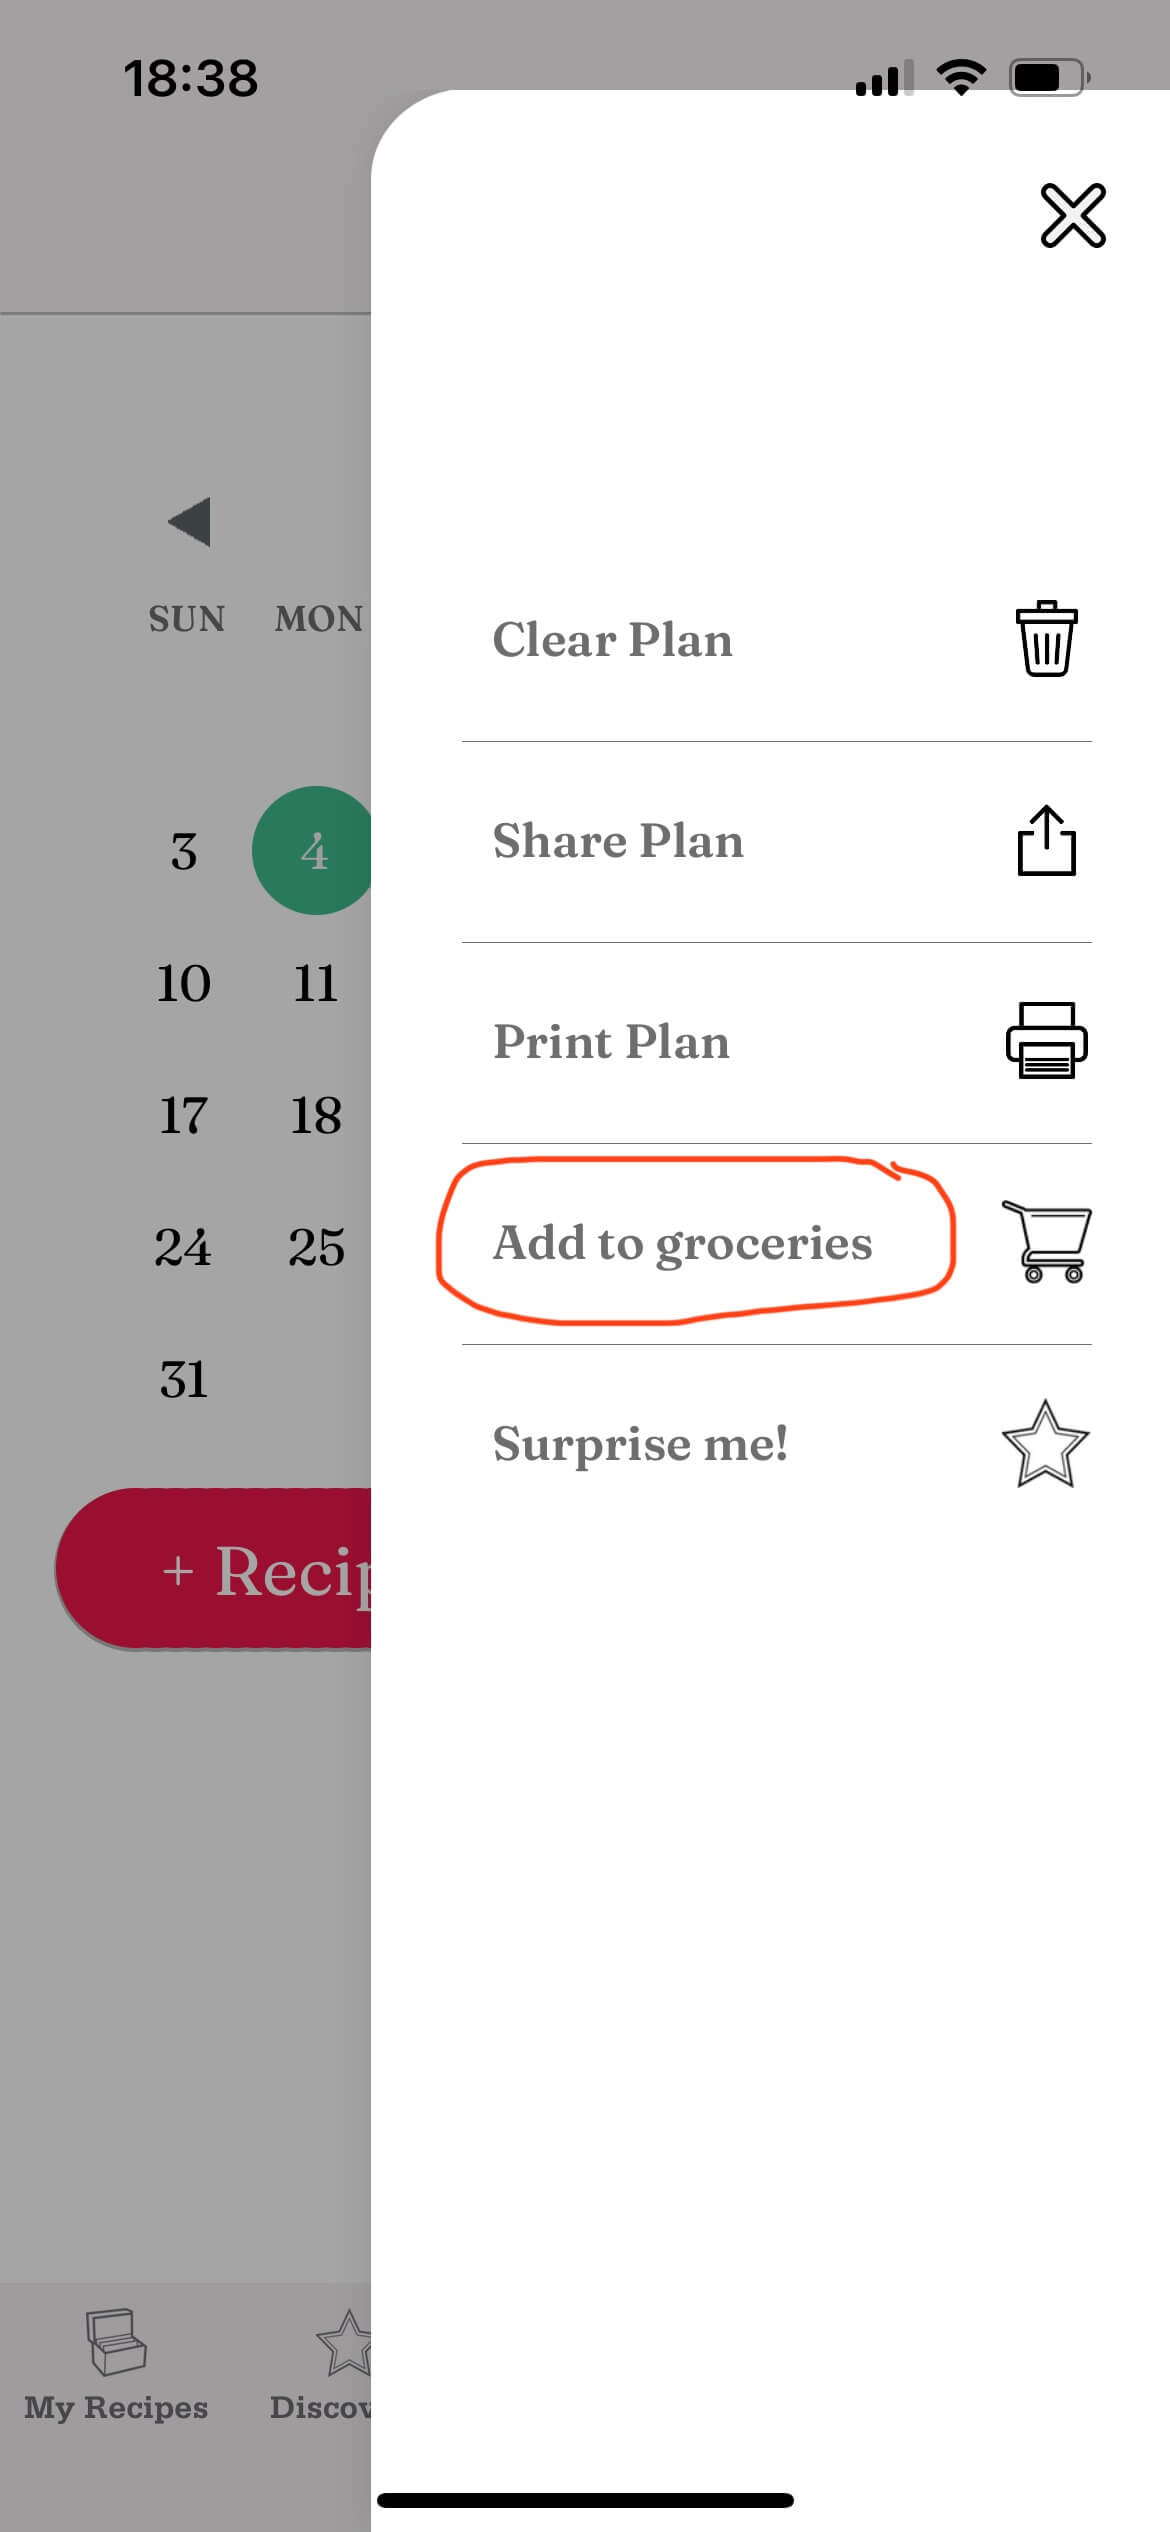
Generating a Grocery List from your meal plan:
Tap on “More” (the 3 lines button at the top right corner of the screen)
Select “Add to groceries”
Choose weekly or monthly
All the ingredients from the recipes scheduled for this week/month will be added to your grocery list!
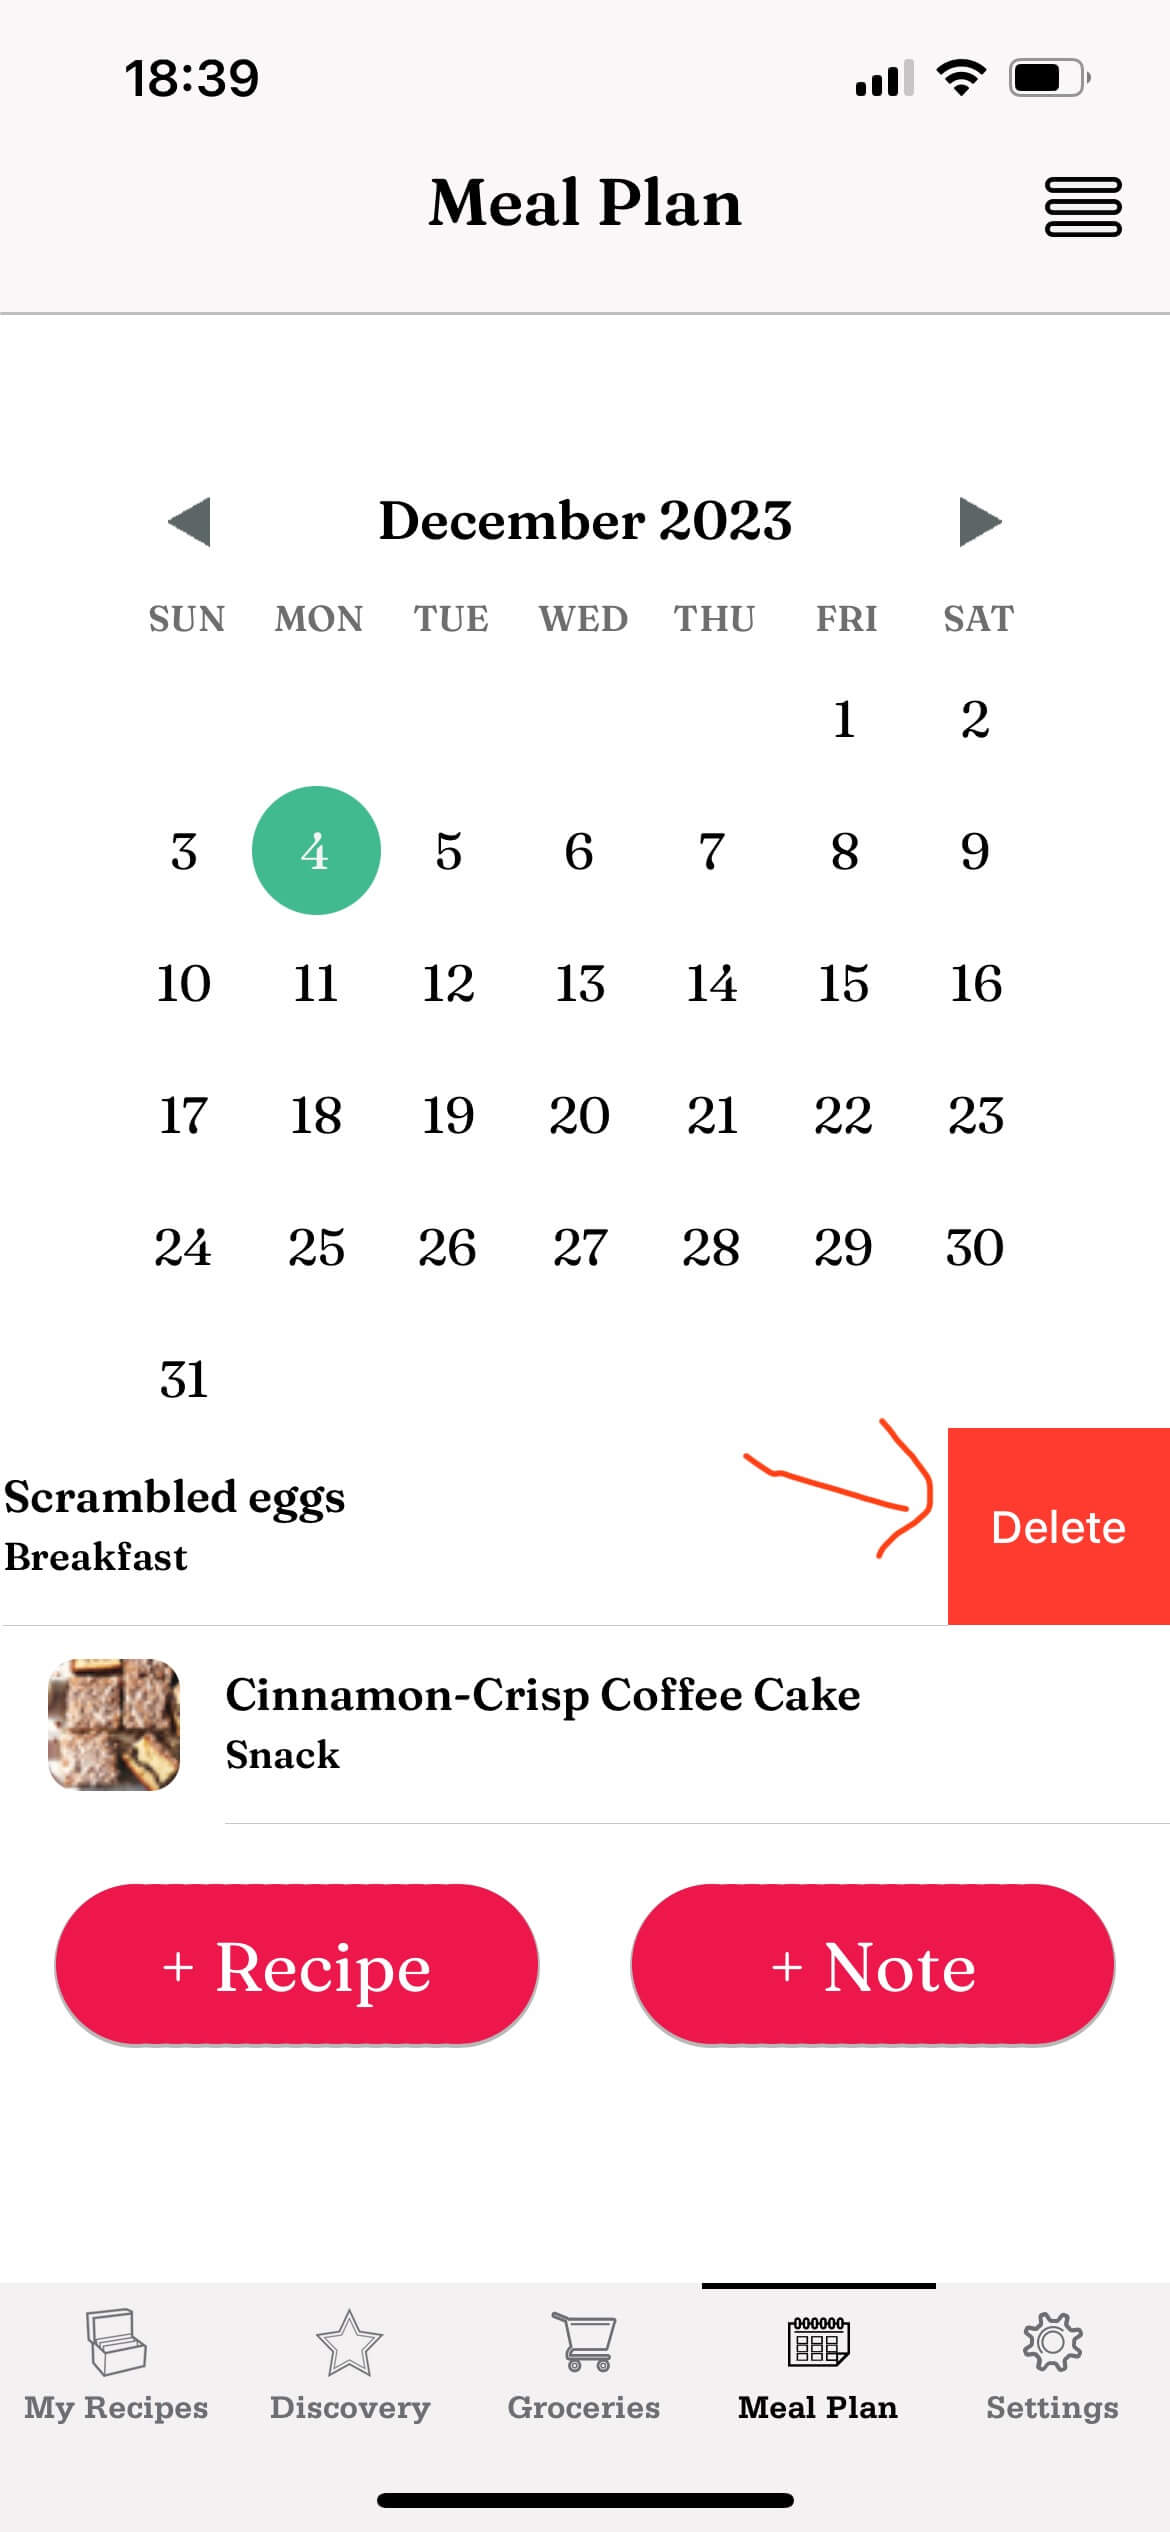
Deleting a recipe from the meal plan:
Select the day where the recipe you want to delete is scheduled
“Swipe” to the left the scheduled recipe row
Confirm by pressing the red “Delete” button that is revealed
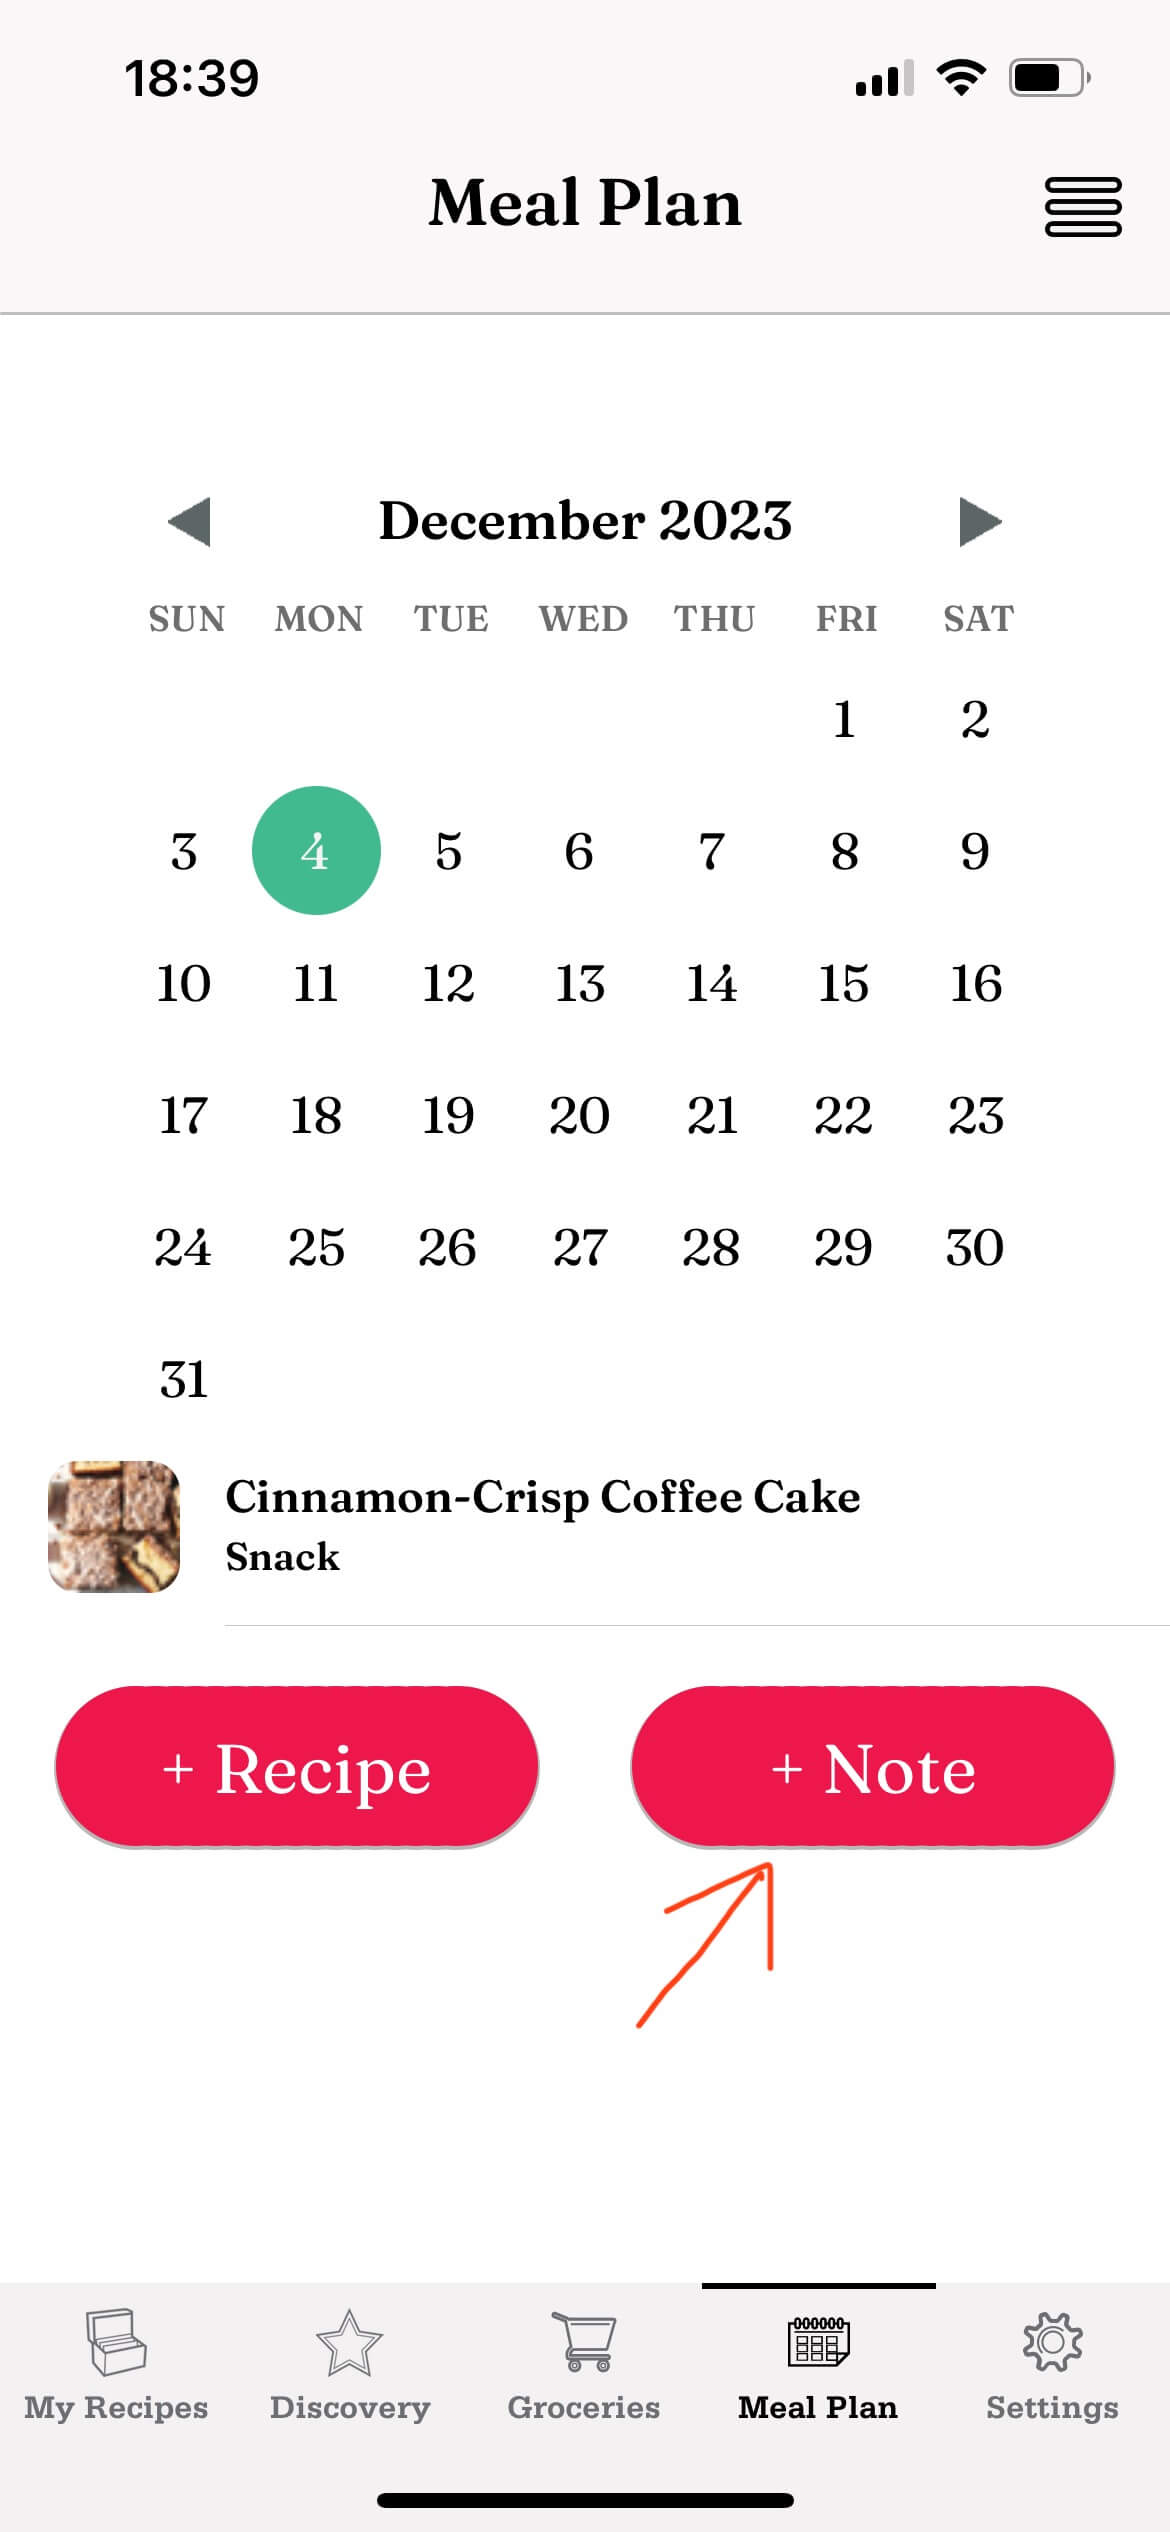
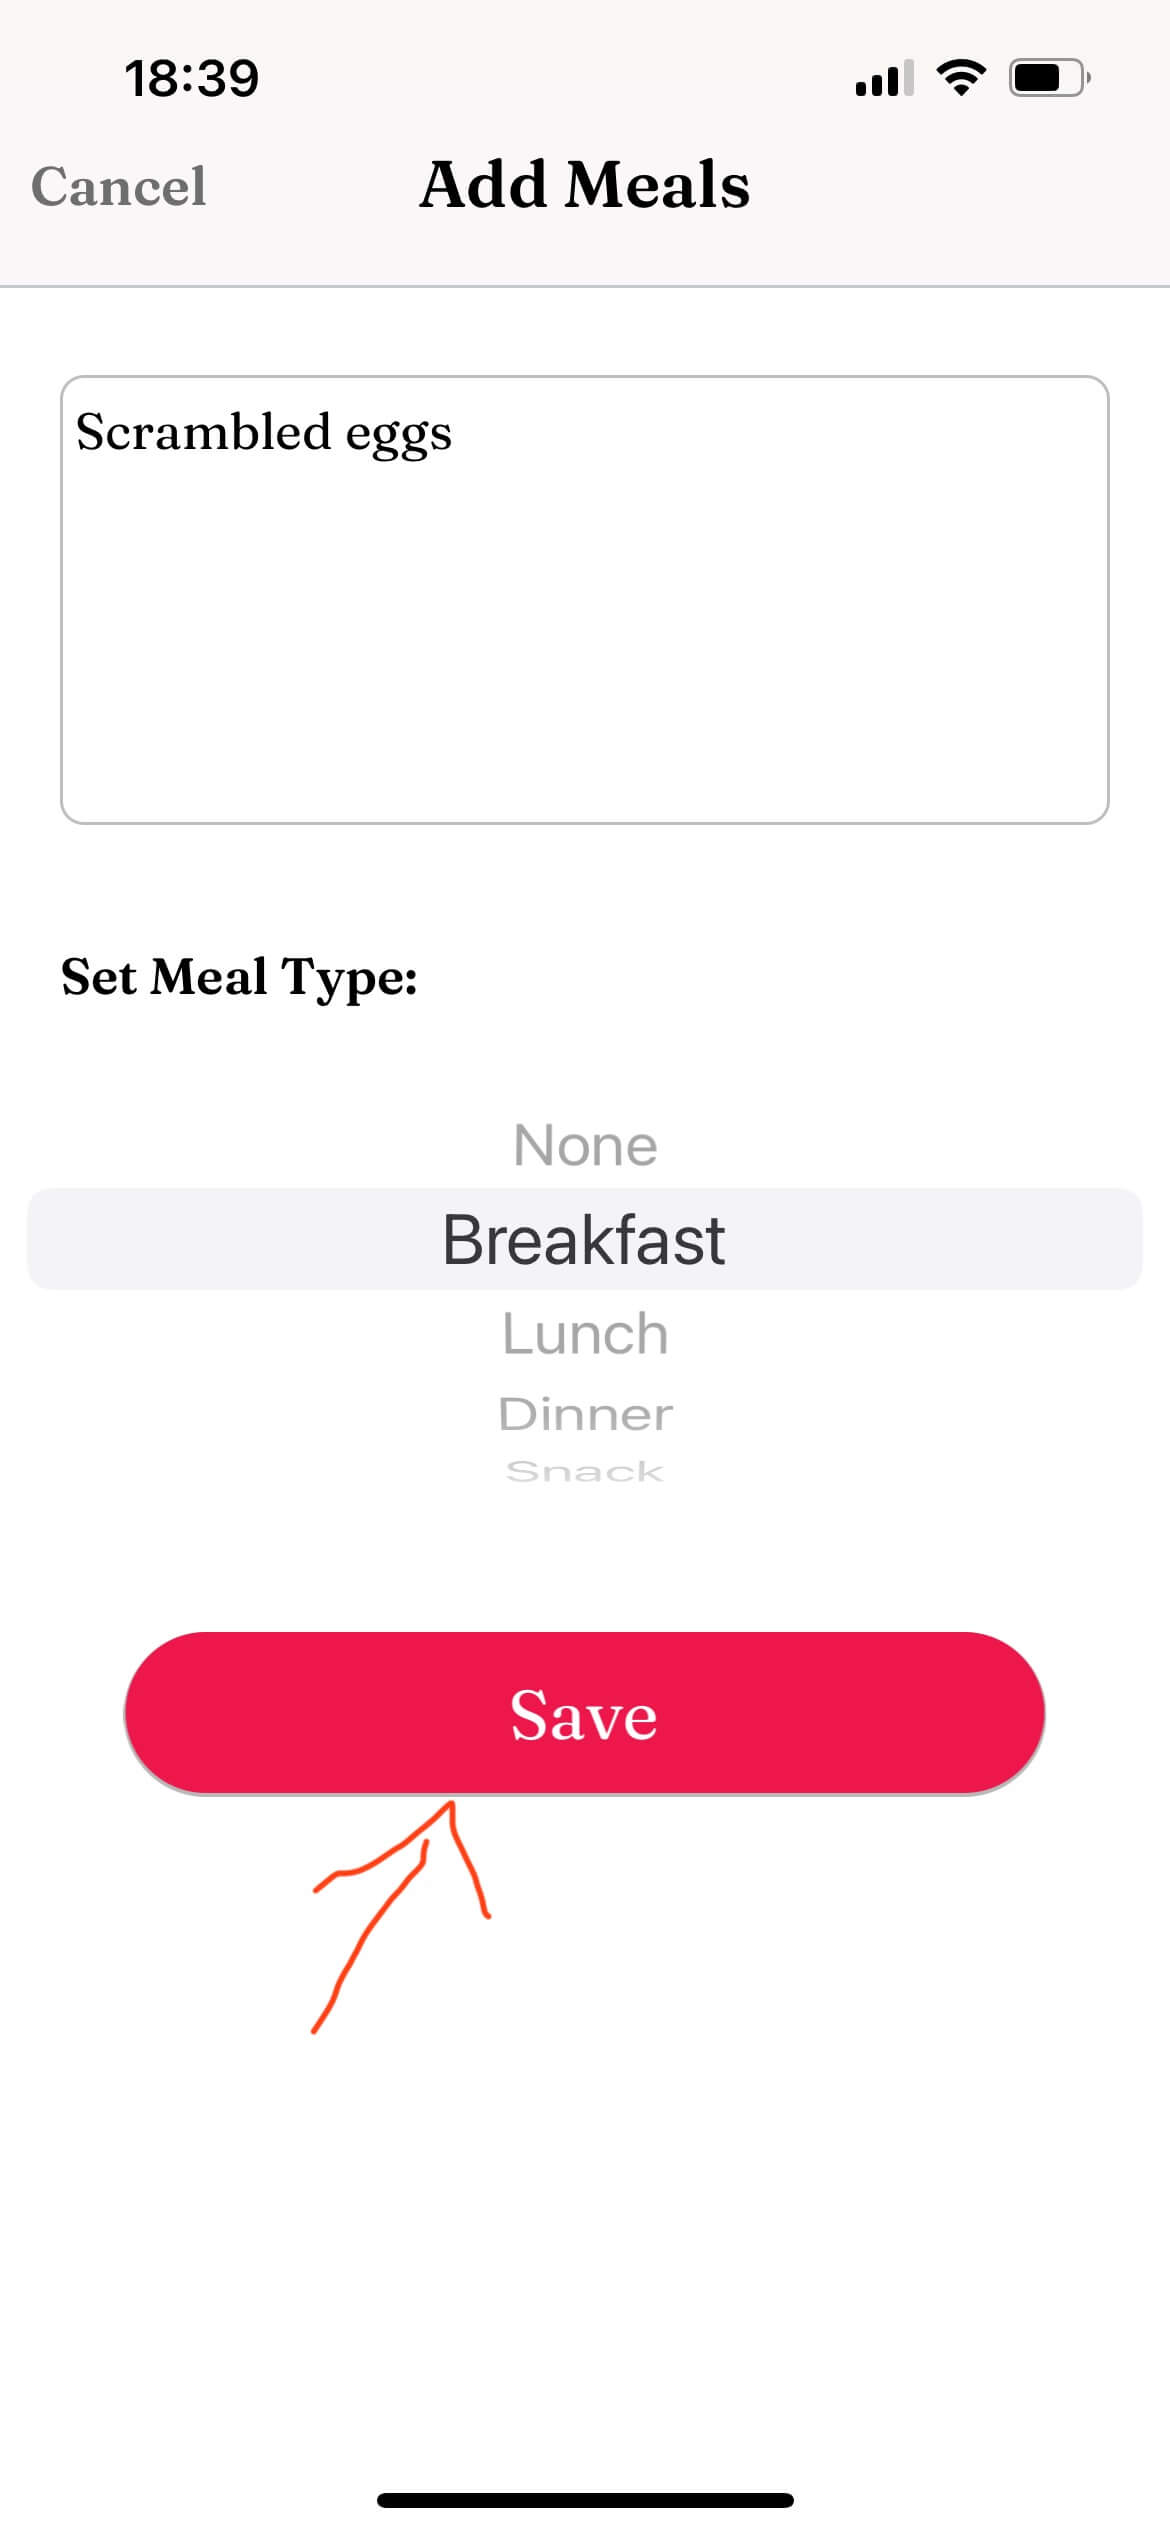
Adding a note to your meal plan:
Some days you are not planning to cook any recipe, but you still want to write the details down in order to keep track of your meals. For example “Eating out night (Sushi)”
Click on “+Add a note”
Type in you note
Select the meal type (optional)
Press “Save”
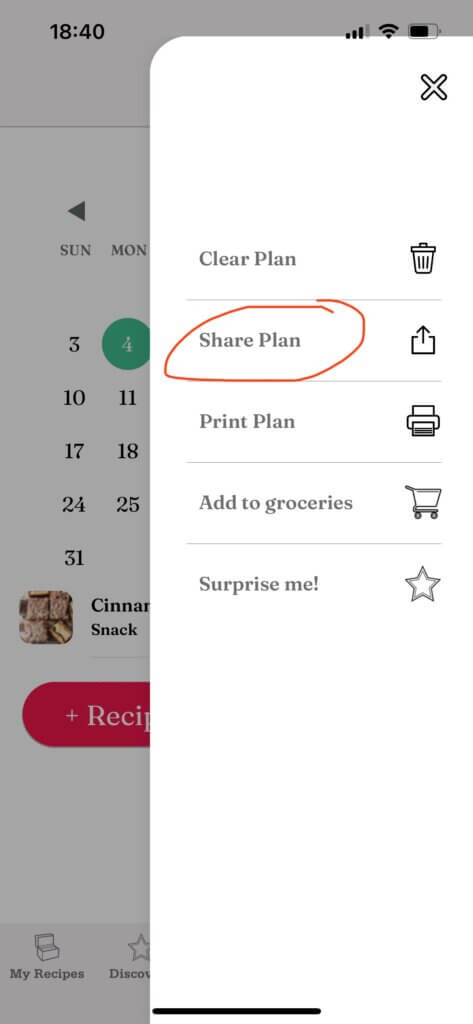
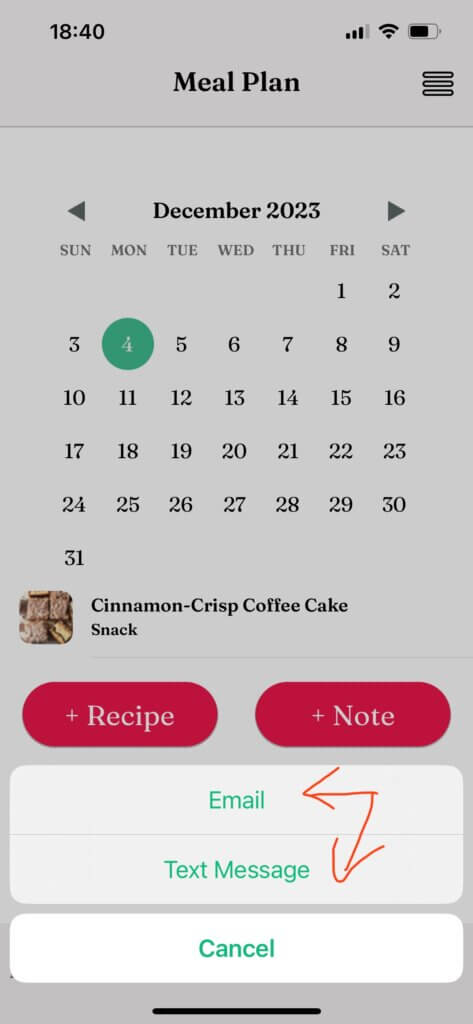
Sharing your meal plan:
Tap on “More” (the 3 lines button at the top right corner of the screen)
Select “Share Plan”
Choose “email” or “text message”
Send the generated email or text
Printing your meal plan:
Tap on “More” (the 3 lines button at the top right corner of the screen)
Select “Print Plan”
Choose weekly or monthly
Print the plan
Clearing your meal plan:
Tap on “More” (the 3 lines button at the top right corner of the screen)