EDITING FOLDERS
Getting to the "Edit Folders" screen:
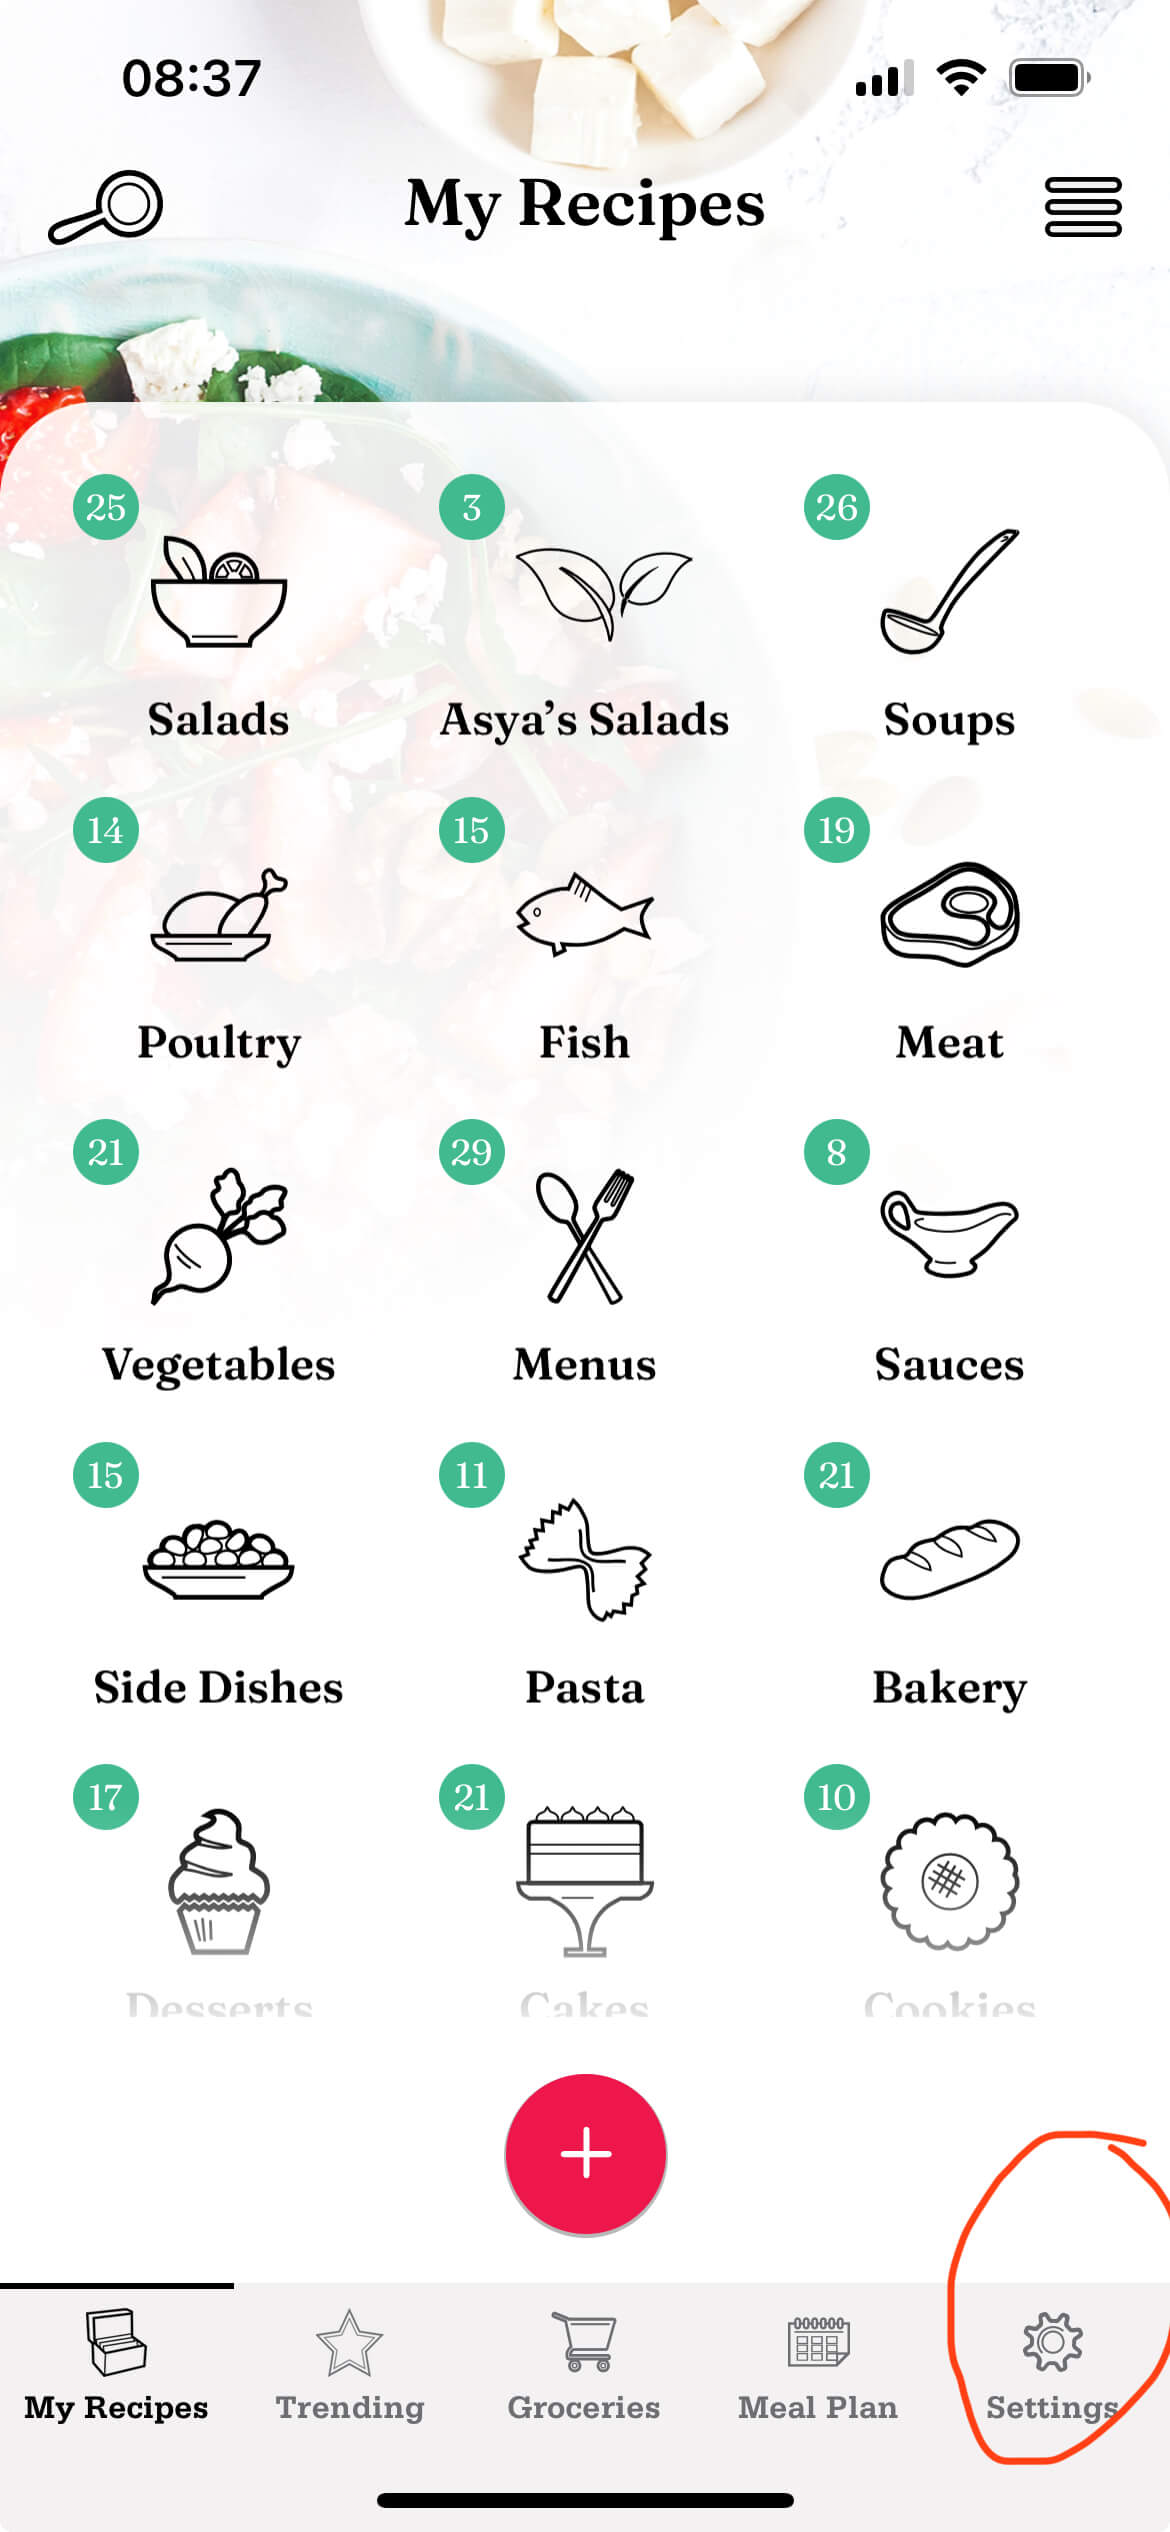
- Please go to “Settings” (the little gear icon on the top left corner of the main screen);
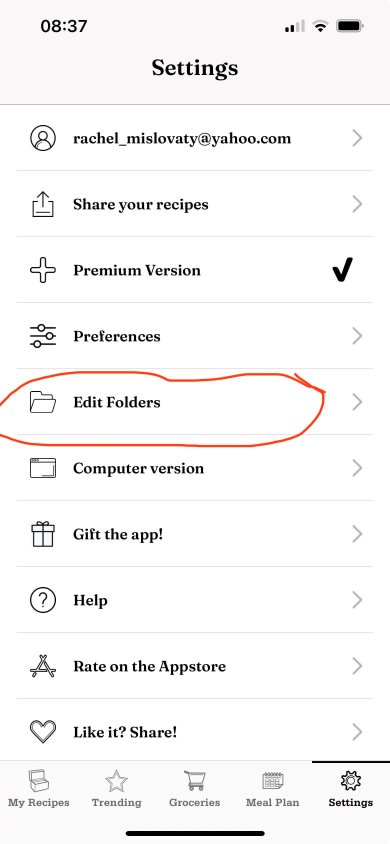
- Tap “Edit Folders”.


Managing your Folders:
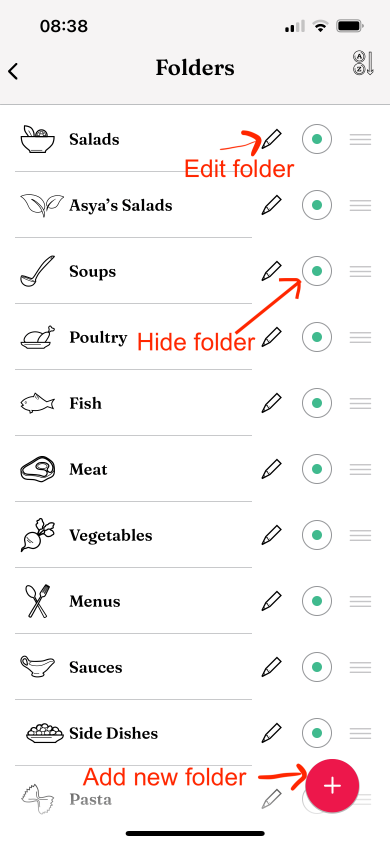
Here you can reorder, rename, and hide your existing Folders.
- Edit a Folder:
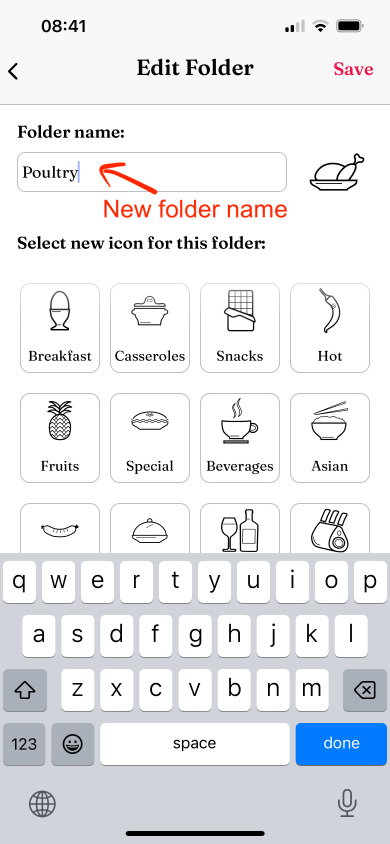
In order to rename a folder or change its icon, press on the small pencil button next to the folder you want to edit. The folder will open in a new screen, where you can type in a new name for it, or choose a new icon. When finished, press “Save” at the top right corner of the screen.
(Note: if you try to completely delete the name field, leaving the name empty, it will revert to the old name. Otherwise, the new name you have typed in will hold.)
- Hide a Folder:
On the left, next to each one of the folders that appear on the list, there is a radio button. It is currently turned on. Press on it, in order to turn it off, and the folder will become hidden.
- Reorder Folders:
On the right side of each folder’s row, there appears a 3-lines symbol (this is the standard iOS reordering control). A long press on it will allow you to hold the row and drag it into a different place. When you release it, it will become the folder’s new place. The new order is saved automatically, so when you are done, simply return to the main screen, and you’ll see your folders’ in their new order right away.


Adding new custom Folders:
Here you can reorder, rename, and hide your existing Folders.
- Add a new folder:
From the previous screen, tap on the little “+” button on the top right corner of the screen. A whole gallery of many custom icons is there, for you to choose. Select the icon you like most, enter the name of the new folder in the text field above, and press “Save”. That’s it, your new folder is ready!
- Unhide a folder:
In the gallery of additional icons, there would also appear those icons you don’t use anymore (those you chose to hide). In order to unhide a folder, you can select any of the previously hidden icons, give it any name you want, and create a folder with it once again. When done, press “Save”. That’s it, super easy.
Re-arranging Grocery List Aisles:
Here you can mannualy re-arrange your list by shop aisles:
- Switch the list to edit mode:
Tap on the three-lines button at the top right corner of the screen, to show the “More” menu. Choose “Reorder list” - The list will appear in an editable state now, where you can drag items from one aisle to another, re-arranging the list by aisles.
- To add another aisle, tap on the “+” button, and select new aisles from the list that will show on the bottom.
- When done, open the side menu again (tap on the three-lines button), and once again press on “Reorder list” to say that you are done reordering the grocery list.