



You've got a great food photo sitting in your iPhone camera roll right now. Maybe it's a bubbling lasagna, a clean slice of banana bread, or the one dinner your family paused to admire before eating. Posting it to Facebook should take a few taps, but the app can still trip people up with missing photos, odd picker behavior, and upload routes that look similar but work very differently.
That's why the best approach is simple. Use the Facebook app itself when you want to post several photos in one go. Use the iPhone Share Sheet when you want to send one good shot quickly. If you also save recipe cards or menu notes on your phone, this guide to using your iPhone as a kitchen-friendly scanner pairs nicely with the same photo-first workflow.
Facebook still matters for sharing everyday cooking. As of 2026, Facebook maintains over 3.07 billion monthly active users, with mobile users generating over 60% of all photo uploads on the platform as of Q2 2025, according to this Facebook mobile upload walkthrough. For home cooks, that means your iPhone is already the main tool for getting dinner from counter to feed.
Table of Contents
- Getting Your Food Photos from Phone to Feed
- The Direct Upload Method Inside the Facebook App
- Using the iOS Share Sheet for Quick Posting
- Organizing Your Uploads with Albums Tags and Privacy
- Troubleshooting Common iPhone to Facebook Upload Issues
- Start Sharing Your Culinary Story
Getting Your Food Photos from Phone to Feed
A lot of people overcomplicate this. They open Photos, then Facebook, then go back to Photos, then wonder why the best image disappeared from the picker. For food photos, that back-and-forth is where mistakes start.
The cleaner workflow depends on what you're posting. A single hero shot of your roast chicken is fastest through the iPhone Share Sheet. A batch of step-by-step photos from dough to finished loaf is easier inside Facebook's own uploader, where you can choose multiple images and shape the post before it goes live.
Pick the route based on the post
Use the app when your post looks like a mini album. That includes holiday desserts, party spreads, or a sequence that shows prep, plating, and the final table.
Use the Share Sheet when speed matters more than layout. If you just want to post one sharp image of tonight's stir-fry with a short caption, it's usually the least fussy option.
Practical rule: Don't choose the method by habit. Choose it by how many photos you need to post.
There's also a quality-of-life point that standard tutorials skip. Food photos often live in a messy mix of Camera Roll shots, screenshots of recipes, edited versions, and shared family album images. Facebook handles those sources unevenly. Knowing that upfront makes the whole process less annoying.
What actually works in daily use
For most home cooks, the reliable pattern looks like this:
- One finished dish photo: Share from the Photos app.
- Several angles or progress shots: Start inside the Facebook app.
- Family event pictures from a shared iCloud album: Expect an extra step.
- Edited iPhone images that don't show up: Check the file format first.
That's the practical answer to how to upload photos from iPhone to Facebook without wasting time. The rest comes down to choosing the right path and knowing where Facebook still gets finicky.
The Direct Upload Method Inside the Facebook App
If you're posting several photos from the same meal, this is the method to use. Facebook's internal uploader is better suited to batch posting, and it gives you more control over what the finished post looks like.
When this method works best
This route shines when you've taken more than one useful shot. Think overhead plate shot, close-up crumb shot, and one wider photo of the whole table. Facebook's own picker keeps those together better than the iPhone Share Sheet does.
Using the Facebook app's internal gallery selector offers a 10-15% higher success rate for multi-photo uploads compared to the iOS share method because its uploader handles batch processing more efficiently. A blue checkmark visually confirms each selected photo, a UI feature designed to streamline the process, as shown in this multi-photo Facebook iPhone tutorial.
If you work with social workflows beyond casual posting, Developers' Facebook media solution is a useful reference point for understanding how Facebook media handling is structured at a more technical level.
The exact tap sequence
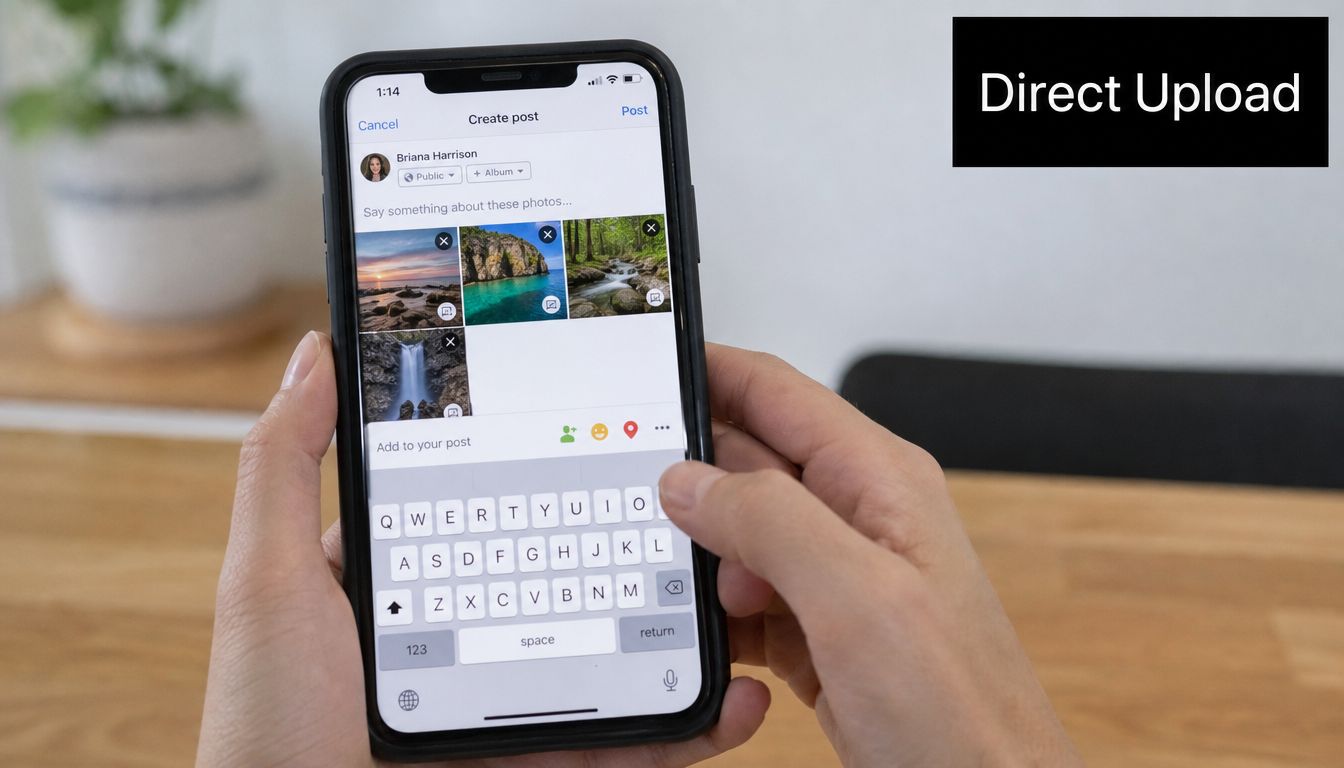
Open the Facebook app and tap the box that says What's on your mind? From there, choose Photo/Video.
You'll see your photo picker. Tap each image you want to add. Facebook marks selected images with a blue checkmark, so you can confirm what's in the batch before posting. On some versions, you may also see the selection count reflected as you build the set.
Once your photos are selected, tap the blue add button in the upper-right corner. That confirms your choices and moves you into the post composer.
From there, finish the post:
- Reorder if needed: Put the best plated photo first. That's usually the image people notice in the feed.
- Add a caption: Keep it short if the photos do most of the work.
- Choose layout options or album placement: This matters more for a holiday meal set than for a single plate.
- Post when ready: If anything looks off, back up before publishing.
A food post usually lands better when the first image is the finished dish, not the prep shot.
A few trade-offs are worth knowing. Facebook may compress images during upload, so if you're comparing pixel-level detail between your camera roll and the posted version, they won't always match. For most cooking photos, that's a fair trade for smoother posting inside the app.
This method is the one I'd hand to anyone posting a dinner recap, a bake-from-start-to-finish gallery, or a set of holiday table photos. It's the least awkward path when volume matters.
Using the iOS Share Sheet for Quick Posting
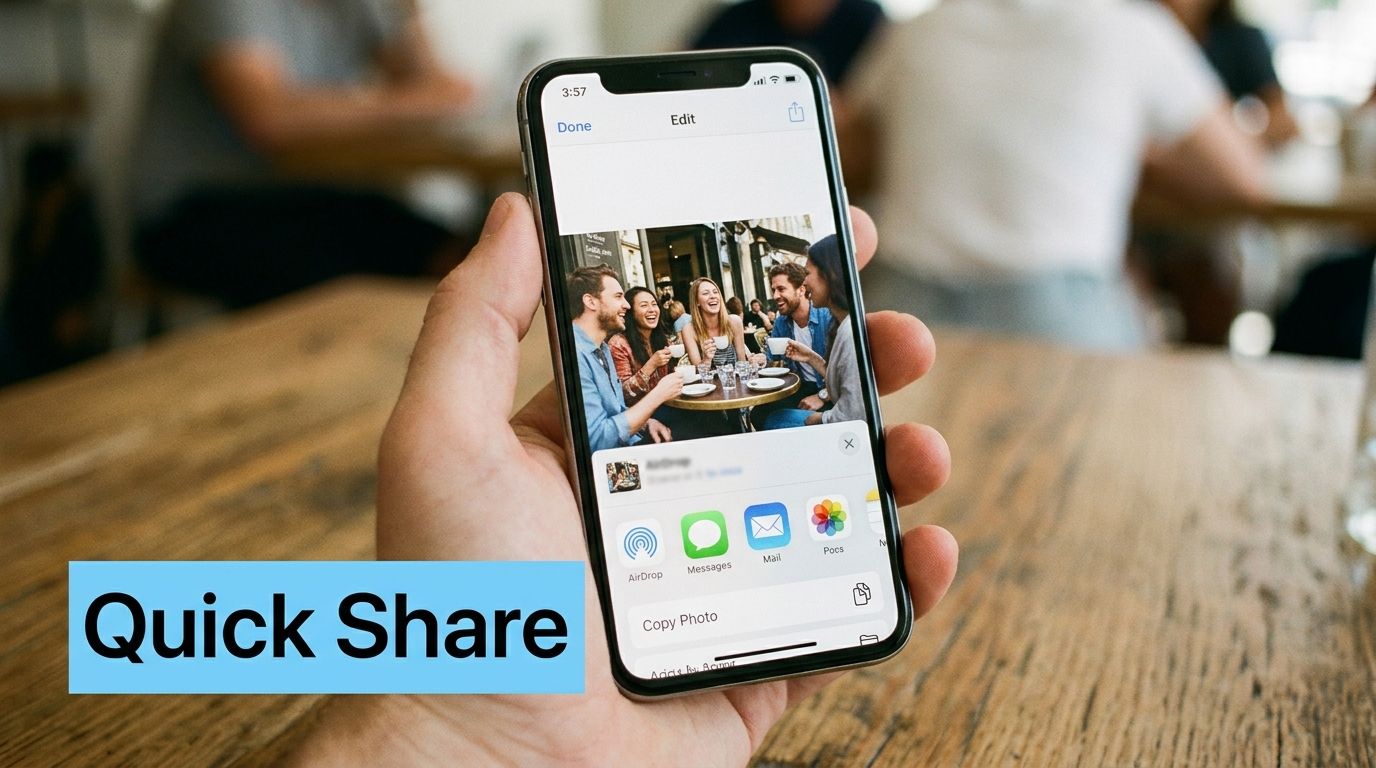
When you only need one photo on Facebook, opening the Photos app first is often faster. You stay with the image you already picked, instead of hunting for it again inside Facebook's gallery.
The fastest path for one photo
Open Photos on your iPhone and select the image you want. Tap the Share icon. In the app row, find Facebook and tap it.
That method is strong for quick posts because the native iOS Photos app's share extension has a success rate approaching 95% for single-image uploads when the Facebook app is updated. It utilizes the system-level Photo Library API, avoiding the session timeout errors that can plague third-party apps, according to this iPhone Share Sheet Facebook upload demo.
On newer iOS versions, the Share Sheet can also send the image to different Facebook destinations. If you long-press and use the share flow carefully, you may be able to route the photo beyond the default feed and choose places like Story or Groups, depending on how your app is configured.
Use this route when your photo is already edited and ready to go. That's common for food shots where you've cropped the plate, brightened the image a touch, and don't need a batch upload.
If Facebook doesn't appear in the Share Sheet
The usual fixes are simple:
- Check that the Facebook app is installed: The Share Sheet won't offer apps that aren't available on the device.
- Update the app: Older app versions are more likely to drop out of the share flow.
- Look at Share Sheet ordering: If Facebook is buried, edit the Share Sheet so it appears earlier.
- Confirm you're signed in properly: Authentication problems can break sharing.
For a basic existing-photo flow, older but still useful guidance follows the same idea: tap the Facebook icon, choose Photo, then Choose From Library, then Camera Roll, select the image, and attach it before posting, as described in this iPhone to Facebook photo upload walkthrough.
Here's a quick visual walkthrough if you prefer to see the taps in motion.
This route isn't my first pick for a full dinner album. It is, however, excellent when you've got one standout image and want it online before the food gets cold.
Organizing Your Uploads with Albums Tags and Privacy
Uploading is only half the job. If you cook and post regularly, a little organization keeps your feed useful later, especially when you want to find old photos from a holiday menu or a run of baking projects.
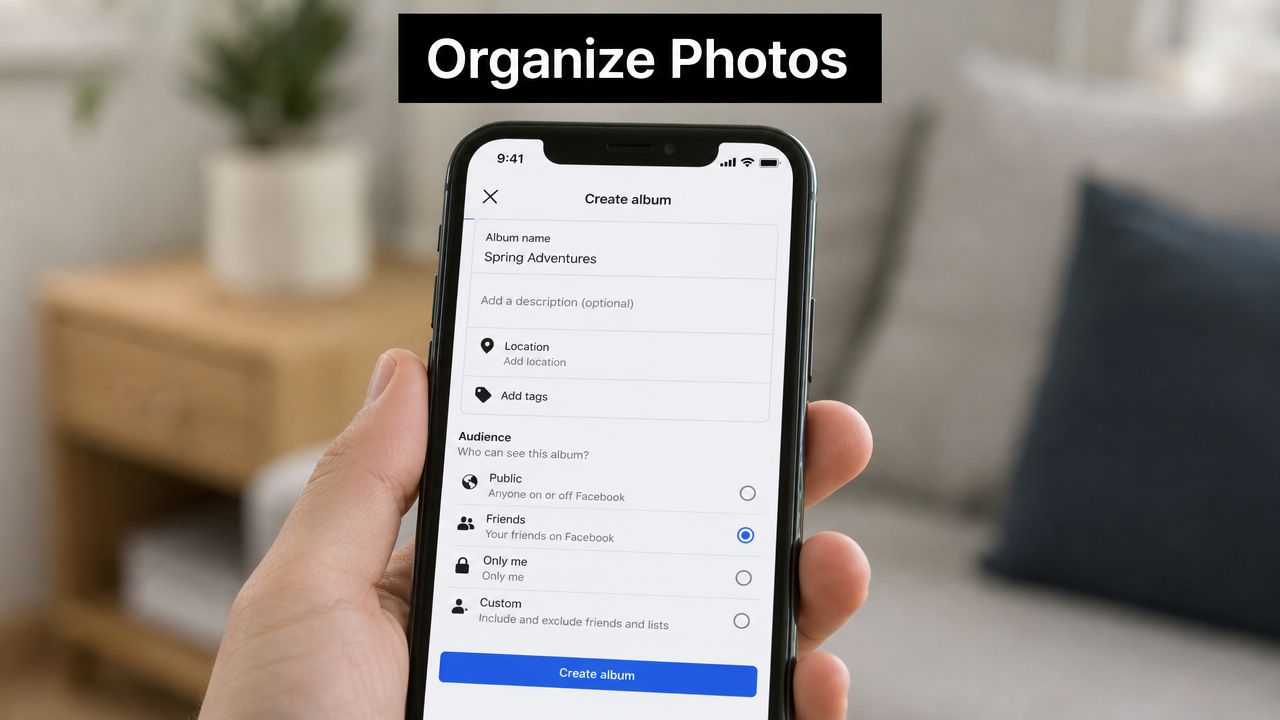
Use albums when the meal is part of a series
Albums make sense when the photos belong together over time. A single weeknight pasta doesn't need one. A full set of birthday dinner photos probably does.
Good album examples for home cooks:
- Baking projects: Bread, cookies, cakes, and experiments that you'll want to compare later.
- Holiday meals: Thanksgiving, Eid, Christmas brunch, or family reunion cooking.
- Farmers market finds: Ingredient photos, meal ideas, and finished dishes from the same shopping trip.
Albums also help if relatives comment weeks later and you want all those photos in one place instead of scattered through your timeline.
Add context before you post
A better post usually has a little framing around the photo. Facebook gives you a few useful tools right at upload time:
| Feature | Best use |
|---|---|
| Caption | Name the dish or mention what made it work |
| Tagging | Add the people who cooked or ate with you |
| Location | Save the restaurant, market, or event spot |
| Audience setting | Control who can see the post |
Audience matters more than often acknowledged. A cake photo for close friends might stay on Friends. A public recipe-test album for a food page might use Public. Family dinner photos often make the most sense with a narrower setting.
Kitchen-smart habit: Check the audience selector before posting, not after.
If you manage photos across more than one social platform, workflow discipline helps. People who also post to Instagram often benefit from reading how to streamline Instagram content creation, because the same habits apply here: pick the best cover image, keep albums intentional, and don't dump every near-duplicate shot into one post.
There's no need to over-organize. Just give recurring food photos a home, add the people and place when it matters, and make sure the audience is what you intended.
Troubleshooting Common iPhone to Facebook Upload Issues
The frustrating part of Facebook photo uploads isn't the basic posting flow. It's the odd failures. A photo doesn't appear. The picker looks incomplete. A shared album image won't come through cleanly. Those are the problems that eat time.
Why photos go missing from the picker
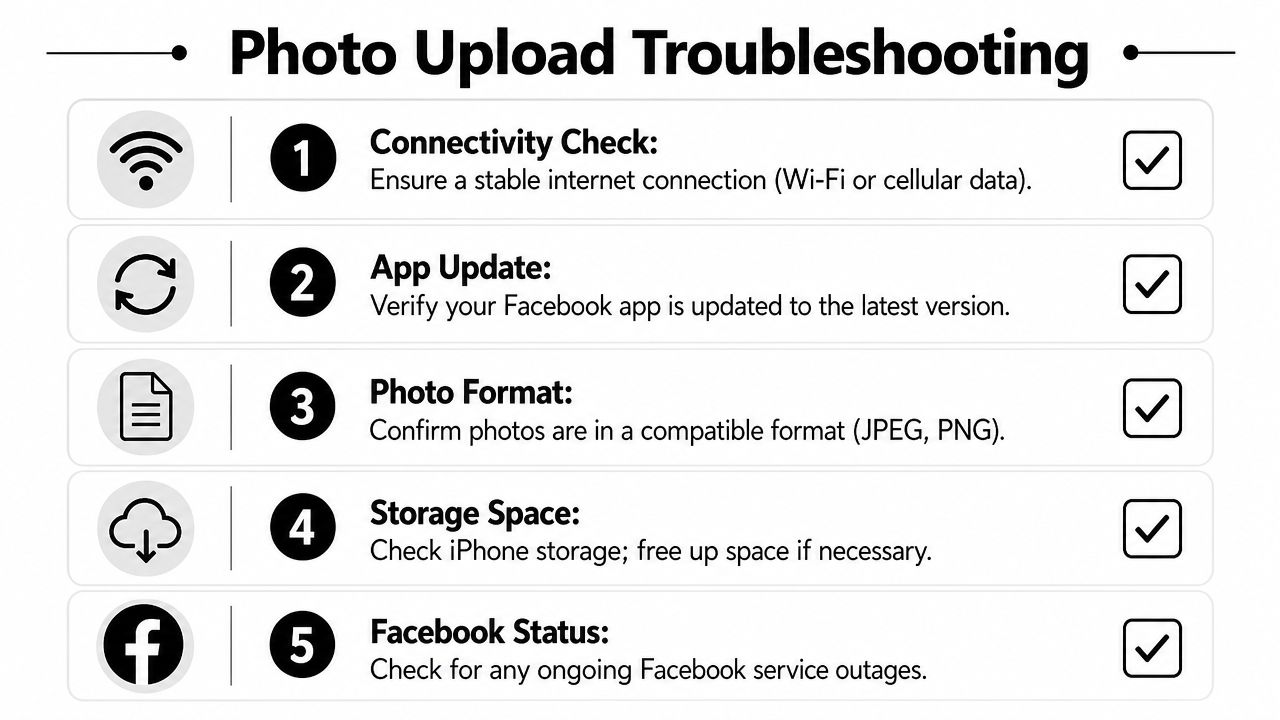
One of the least explained issues is the HEIC format. Some iPhone photos, especially edited images or screenshots mixed into your library, may not show up where you expect inside Facebook.
A common but poorly explained issue is that Facebook's iOS app often lacks native HEIC-to-JPEG conversion, causing photos to vanish from the picker. With over 60% of iPhone photos using the HEIC format, users must often save the image as a new file to force a conversion before it becomes visible for upload, based on this HEIC Facebook picker fix video.
If your plated dish photo won't appear, try this:
- Open the image in Photos: Confirm it exists locally.
- Save a fresh copy: This often forces a more upload-friendly version.
- Try the other upload path: If it fails in Facebook's picker, try the Share Sheet, or the other way around.
What to check when uploads fail outright
Hard failures usually come from settings, not from the photo itself. Start with permissions.
Go to iPhone Settings, find Facebook, and check Photos access. If Facebook can't access your photo library, uploads won't even get off the ground. It's also worth confirming that the app is updated and that your connection is stable.
If Facebook can't see your photos, no amount of re-tapping inside the app will fix it. Check permissions first.
If you also want to manage what Facebook already has, this guide on importing from Facebook is helpful for cleaning up the bigger picture around saved content.
The awkward shared album workaround
Shared iCloud albums are still clumsy here. If your family keeps holiday meal photos in a shared album, Facebook doesn't give you a smooth direct path from that source.
The practical workaround is to open the shared album, save the images locally, then upload them from your standard photo library. It isn't elegant, and it can create duplicates, but it's the method users keep falling back on when shared album content won't post directly.
That's one of the overlooked realities of how to upload photos from iPhone to Facebook. Camera Roll photos are easy. Shared album photos are not.
Start Sharing Your Culinary Story
The simplest version of this whole process is also the one that works best. Use the Facebook app for multi-photo meal posts. Use the iPhone Share Sheet for one fast, finished image. If a photo disappears, check the format. If an upload fails, check permissions before anything else.
That small bit of method saves a lot of friction. You spend less time wrestling with pickers and more time sharing the sourdough crumb, the birthday cake, or the weeknight soup your family wants the recipe for. If you're building a longer-term system for food memories, recipes, and saved inspiration, this guide to the best app for sharing photos is a useful next step.
If your Facebook feed is full of dishes you want to remember, not just share, OrganizEat gives those recipes, screenshots, handwritten cards, and cooking photos one organized home. Save recipes from social posts, scan old recipe cards, build grocery lists, and keep everything synced across devices so your food ideas don't disappear into the scroll.