




Your iPad still turns on. The picture looks fine. But touch is off, delayed, jumpy, or dead in one corner, and that makes the whole device feel broken. A simple tap becomes three taps. Typing a note is annoying. Saving a recipe, scrolling a grocery list, or using your tablet in the kitchen turns into a small fight every time you reach for the screen.
That's usually when people start searching for a digitizer for iPad and run into a mess of half-true repair advice. Some guides treat the glass, touch layer, and display like they're all the same part. Others make DIY replacement sound easy when it may be anything but. The smart choice isn't just about price. It depends on what failed, which iPad model you have, and whether the repair risk is acceptable.
If you're still in the “is this software or hardware?” phase, it helps to rule out the basics first. A practical complete iPad troubleshooting guide can help with resets and common behavior checks before you spend money on parts or service. If your iPad is part of a workflow for saved files and kitchen use, this walkthrough on how to download PDF files to iPad is also useful for testing whether taps, scrolling, and file interactions still behave normally.
Table of Contents
- Your iPad Is Acting Up Now What
- Understanding the iPad Digitizer vs the Display
- Diagnosing a Failing Digitizer Symptoms and Simple Tests
- Comparing Your Repair Options DIY vs Professional vs Apple
- The Hidden Dangers of DIY Digitizer Replacement
- After the Fix Stylus Performance and Proactive Care
Your iPad Is Acting Up Now What
A lot of digitizer problems start in a way that's easy to second-guess. One edge of the screen stops responding. The keyboard misses letters. The iPad opens the wrong app because it registered a tap you didn't make. If the image still looks normal, people often assume the problem is minor.
The first useful distinction is this. A bad display affects what you see. A bad digitizer affects how the iPad responds to touch. You can have a perfectly visible screen and still have a failing touch layer.
Start with behavior, not parts
Before shopping for a digitizer for iPad, watch the pattern:
- Touches fail in the same spot: That often points to a dead zone rather than a random software hiccup.
- Inputs lag or jump around: This can feel like the iPad is “thinking,” but it may be bad touch detection.
- The screen looks fine but won't respond: That's one of the classic digitizer complaints.
- The problem worsens with simple tasks: Typing, dragging, pinch-to-zoom, and tapping small controls usually expose it quickly.
Practical rule: If the display image is stable but touch is unreliable, start thinking about the touch layer before blaming the whole screen.
Don't confuse inconvenience with a small repair
A flaky touch layer doesn't just make the iPad annoying. It changes whether the device is dependable. That matters if you use it while cooking, reading, signing forms, or organizing household information. Small jobs become frustrating because touch is your entire control surface.
The good news is that you don't need lab equipment to make a smart first decision. You need a simple mental model, a few checks, and a realistic view of repair risk.
Understanding the iPad Digitizer vs the Display
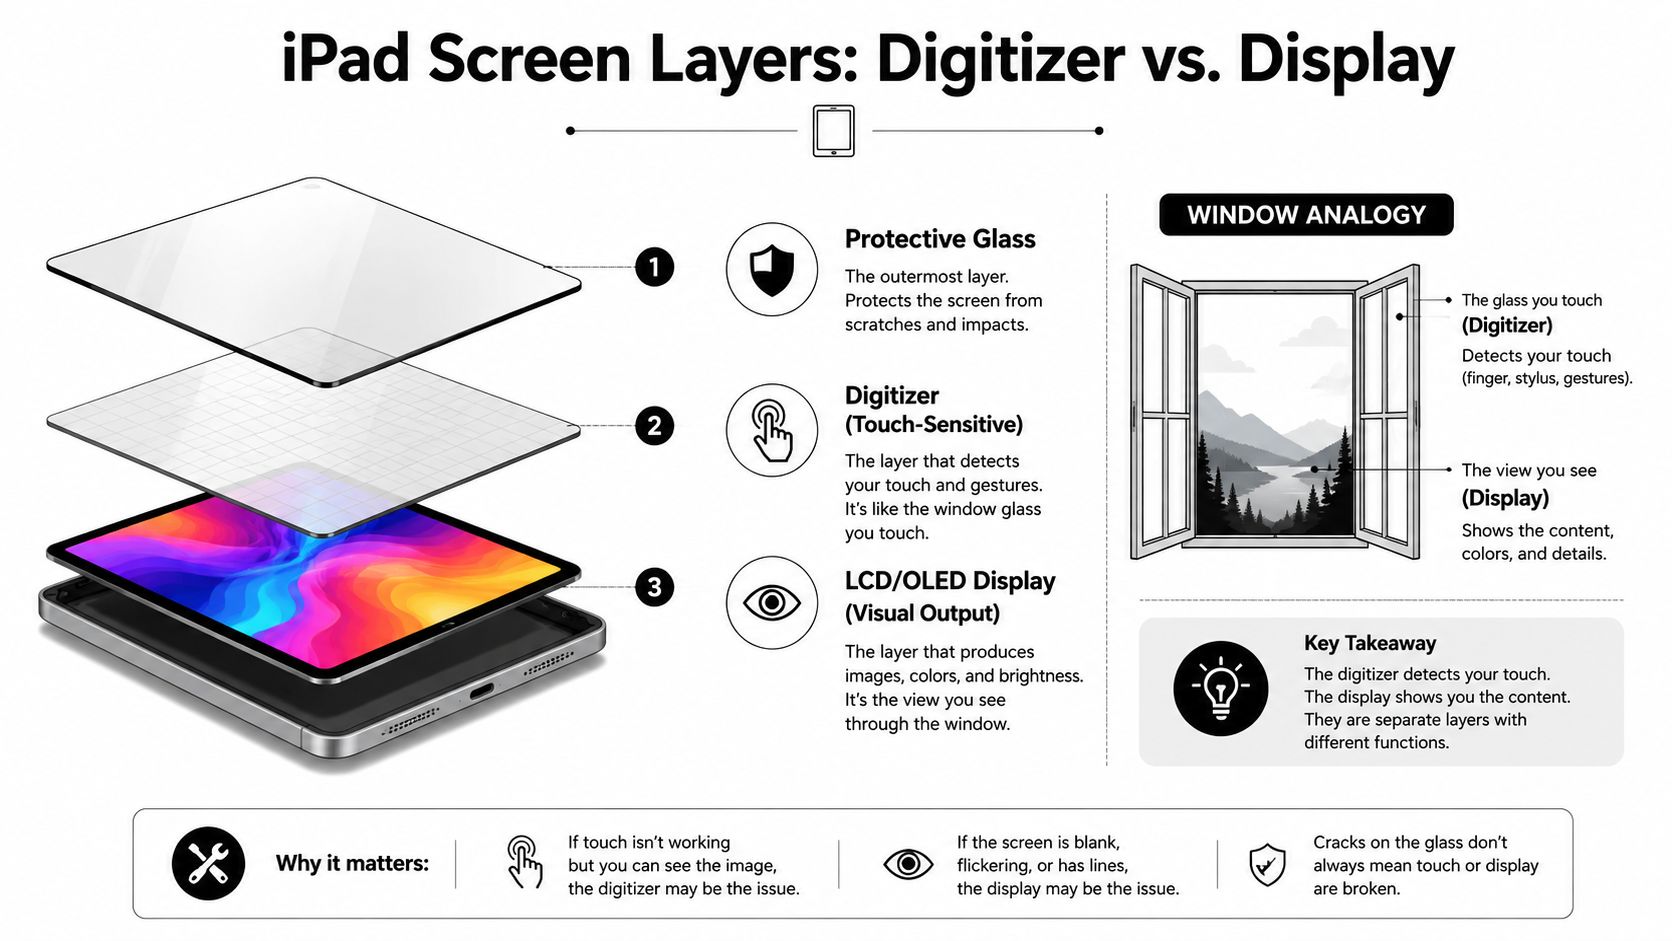
The most straightforward way to comprehend an iPad screen is to view it as a window.
The part you touch is the layer that listens for your finger or stylus. The part you see through creates the image. People often call the whole front assembly “the screen,” but repair decisions depend on separating those jobs in your mind.
What the digitizer actually does
The digitizer is the touch-sensitive layer. It captures taps, swipes, drags, and gestures, then translates that input into actions on screen. If you tap an icon and nothing happens, or the iPad thinks you tapped somewhere else, the digitizer is a likely suspect.
The display is different. That's the LCD or OLED panel producing the image. If you see discoloration, lines, no image, or blacked-out sections, the display layer is usually involved.
This distinction matters because Apple has consistently used out-cell digitizer architecture across all iPad models, meaning the touch-sensitive layer and the display panel are manufactured as separate components, and that has been a defining iPad characteristic since the line began in January 2010, as discussed in this technical overview of iPad out-cell design.
Why iPad repairs get confusing
“Separate components” sounds like a clear win for repair. In practice, it's more nuanced. On paper, a separate touch layer means the digitizer can sometimes be replaced independently. In real repair work, adhesive, heat, alignment, connector condition, and model-specific construction decide whether that's sensible.
That's where a lot of online advice goes off the rails. A video showing one model's glass coming off cleanly can make people assume every iPad works the same way. It doesn't.
Think of it like replacing a cracked window pane versus replacing the whole framed window unit. Sometimes the pane comes out cleanly. Sometimes the construction makes that a bad bet.
Regarding digitizers for iPad, the core takeaway is: the touch layer and the display have different jobs, and repair planning starts by identifying which one failed.
Diagnosing a Failing Digitizer Symptoms and Simple Tests
A failing digitizer rarely announces itself with a tidy error message. It shows up as weird touch behavior, often while the screen still looks normal.
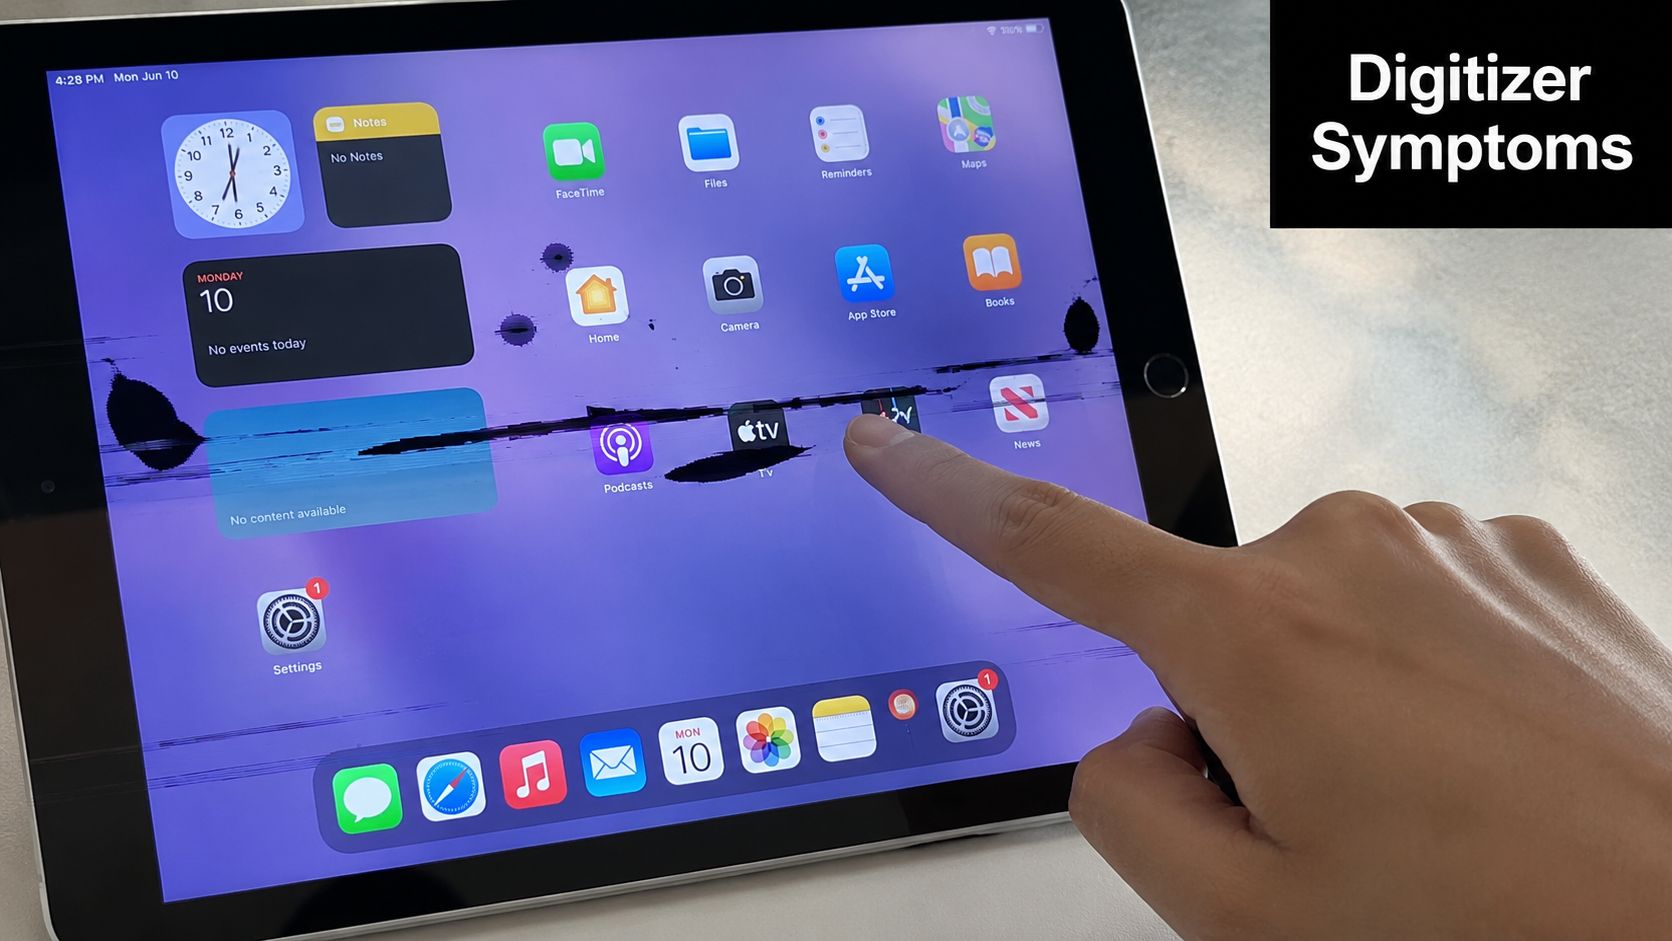
Common signs the touch layer is failing
Some symptoms are strong clues:
- Dead zones: One strip or corner doesn't respond no matter how many times you tap.
- Ghost touches: The iPad acts as if someone touched the screen when no one did.
- Missed gestures: Swipes break halfway, or pinch gestures don't register correctly.
- Tap offset: You press one place, and the iPad responds somewhere nearby.
- Intermittent touch loss: The device works for a moment, then touch disappears again.
These issues are more than annoying if you rely on touch-first tasks. For example, the Snap ‘n Store workflow lets you photograph a handwritten card or cookbook page and quickly save it with a title and folder, but that kind of capture flow becomes frustrating or impossible when the digitizer won't register taps reliably, as shown in this Snap ‘n Store recipe capture walkthrough.
Checks worth doing before calling it hardware
Don't jump straight to parts ordering. Run a few basic checks first.
- Clean the glass thoroughly. Grease, moisture, and residue can make touch feel inconsistent.
- Remove the case and screen protector. A warped protector or badly fitted case can interfere at the edges.
- Restart the iPad. Temporary touch glitches do happen.
- Test multiple apps. If one app is odd but the rest behave normally, the issue may not be hardware.
- Try slow, deliberate gestures. Draw across the screen, open folders, drag icons, and test the keyboard.
A simple visual demo can help you compare normal behavior with damaged-screen behavior before you decide what's next.
When the issue points to the digitizer
If touch fails in the same area after cleaning, restarting, and removing accessories, that's when the hardware case gets stronger. The strongest clue is consistency. Software bugs tend to be erratic in different ways. Hardware faults usually repeat themselves.
A visually good screen can still hide a touch failure. If the image is fine but your inputs aren't, don't let the intact glass fool you.
There's also a practical test I like. Open an app with small targets, such as on-screen keys or tiny menu buttons, and try the same motions several times. If you get the same misses in the same region, the device is telling you something specific.
Comparing Your Repair Options DIY vs Professional vs Apple
Once you're confident the touch layer is the problem, the key consideration becomes which repair path gives you the best balance of cost, risk, and hassle. Often, many people focus only on the cheapest sticker price. That's usually the wrong filter.
iPad Digitizer Repair Options Compared
For common models like the iPad 9th Gen, third-party repair averages $215, while Apple's official service is $299, with Apple carrying a 30% to 45% cost premium over third-party pricing in common model comparisons, and DIY kits for older models can be as low as $89, according to this repair cost comparison for DIY, third-party, and Apple service.
| Factor | DIY Kit | Third-Party Pro | Official Apple Service |
|---|---|---|---|
| Typical cost | $89 on older models | Around $215 for iPad 9th Gen | $299 for iPad 9th Gen |
| Risk level | Highest | Moderate | Lower from the user's standpoint |
| Skill required | High | Low for the customer | Low for the customer |
| Best for | Confident repair hobbyists with older devices | Most users who want value and less risk | Users who want official service and fixed pricing |
| Main downside | You can damage the device further | Part quality and shop skill vary | Highest price for common models |
If you depend on the iPad across devices, this is also a good moment to make sure your important content is already backed up and accessible elsewhere. A guide on syncing an iPad with your phone helps reduce the stress of being without the tablet during repair.
Which option fits which user
DIY works best when the device is older, the repair path is well documented, and you're comfortable with heat, adhesive, delicate connectors, and the possibility that the first attempt may fail. It's the cheapest route on paper. It's also the easiest way to turn one broken part into several.
Third-party repair is often the desired middle ground. The price gap can be meaningful, especially on common models. A good independent shop also tends to be more candid about whether a touch-only repair makes sense or whether the full assembly should be replaced.
Apple service makes sense when you want the official path, fixed pricing, and minimal personal involvement. The trade-off is simple. You pay more.
The cheapest repair is the one you only have to do once.
One more thing matters more than people expect: downtime tolerance. If this iPad is your kitchen screen, reading device, or family planner, speed and reliability may be more important than squeezing out every possible dollar of savings. A lower invoice doesn't help much if the tablet comes back with weak touch response, lifting glass, or a new display problem.
The Hidden Dangers of DIY Digitizer Replacement
DIY repair advice often fails at the exact point where it matters most. It shows the steps, but skips the reasons those steps can go wrong.
Why glass only repair is often the trap
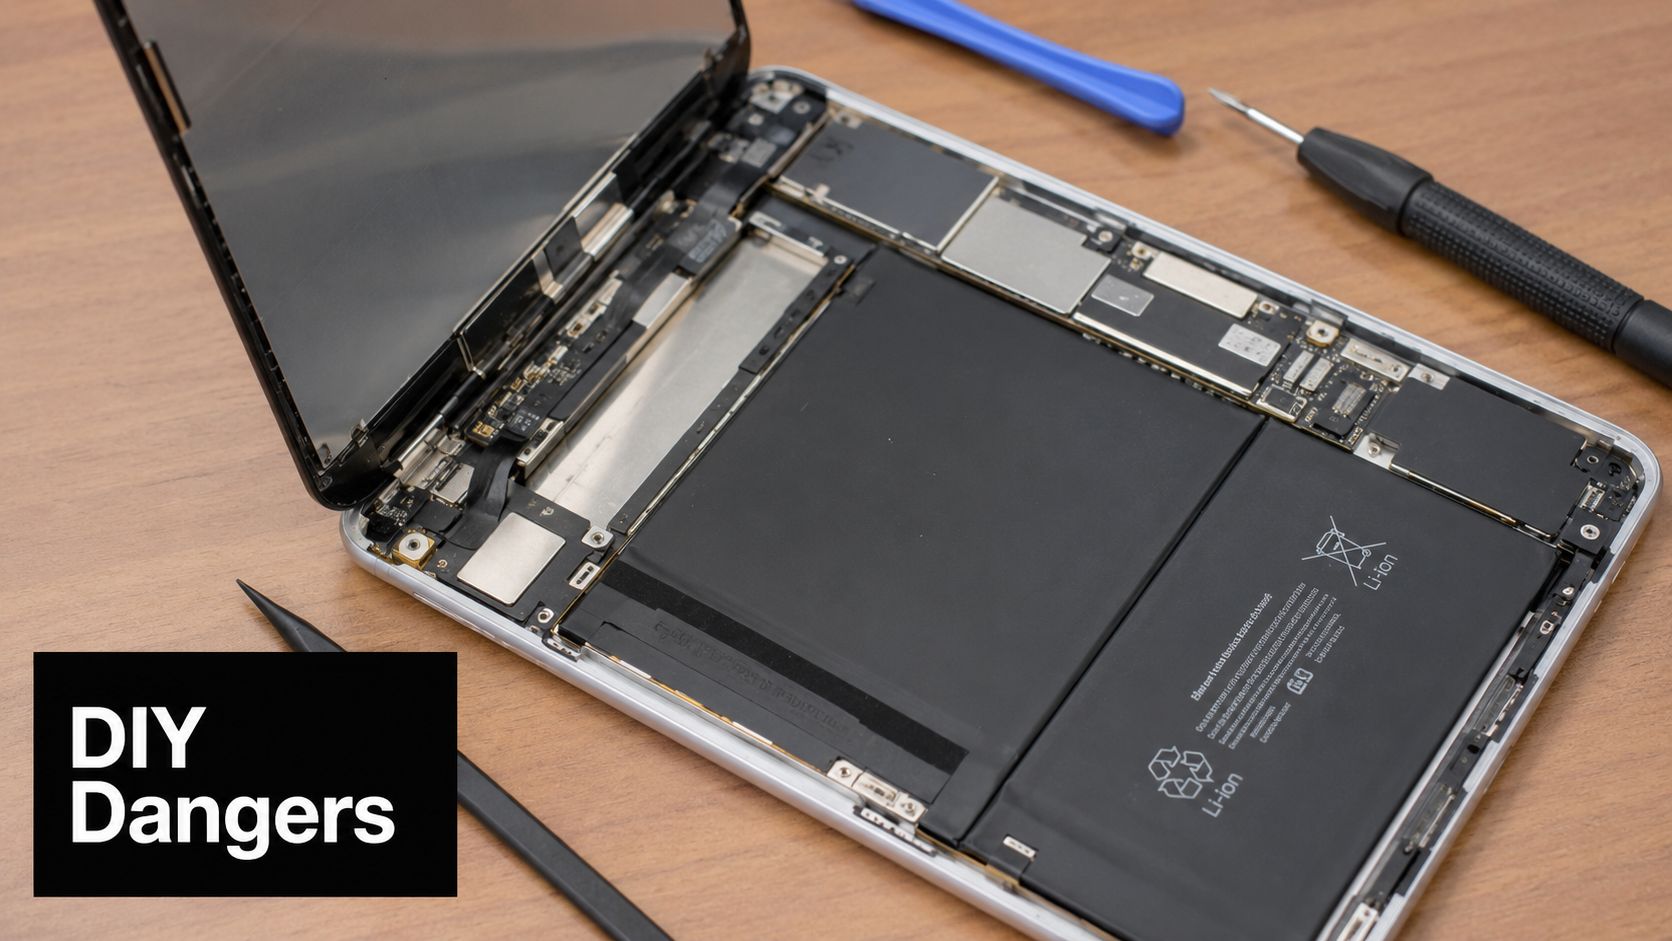
A major misconception is that you can reliably replace only the digitizer on modern fused models such as the iPad Air 2. In reality, those models have the digitizer permanently glued to the display, making glass-only DIY repair statistically likely to shatter the LCD unless you have professional lamination equipment, as highlighted in this repair discussion on fused iPad screen assemblies.
That's the part many quick tutorials soften or skip. They make the job look like “lift glass, unplug cable, install new one.” On a fused assembly, separating the layers cleanly is the hard part. Not the unscrewing. Not the reconnecting. The separation itself.
The connector problem many guides skip
There's a second DIY trap that catches people even after a careful-looking install. The iPad boots. The picture is there. But touch still doesn't work.
One common cause is connector damage rather than a bad replacement part. A missing pin or damaged socket on the digitizer connector can stop touch entirely, and fixing that may require board-level work, including replacing the connector, as described in this iFixit discussion of touch failure after digitizer replacement.
If the iPad shows an image but won't respond to touch after a replacement, don't assume the new glass is defective. The connection path may be the real failure point.
This is why DIY can be deceptive. The repair doesn't only ask, “Can you take it apart?” It asks whether you can control heat, manage adhesive, protect the display underneath, seat delicate cables correctly, and diagnose electrical faults if touch still fails. Individuals searching for a digitizer for iPad don't want a hobby project. They want a working tablet again.
After the Fix Stylus Performance and Proactive Care
Once the iPad is repaired, users often ask two practical questions. Will touch feel normal again, and will a stylus still behave properly?
The answer depends on repair quality more than repair category. A careful repair with good parts usually restores normal everyday use. A rushed repair or poor-quality part can leave you with subtle annoyances, such as missed edge inputs, inconsistent palm rejection, or less predictable pen behavior.
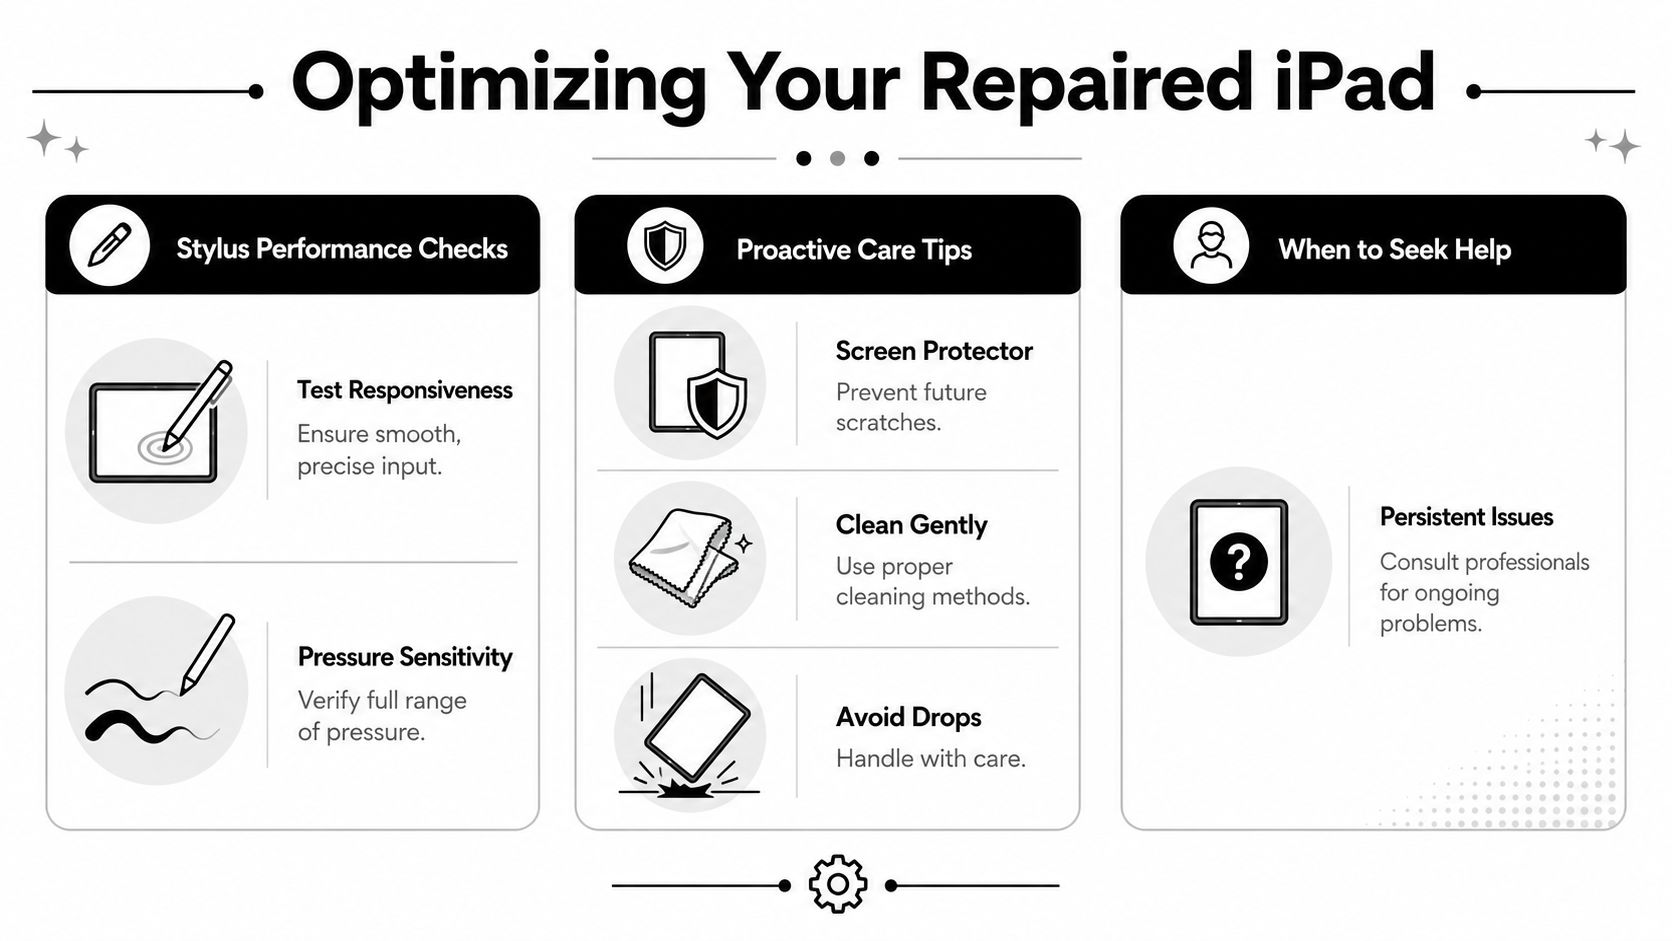
How to check stylus behavior after repair
Run a few practical tests instead of assuming everything is fine because the home screen responds.
- Draw slow lines: Check whether the line tracks the tip smoothly across the whole display.
- Test screen edges: Trouble often shows up near corners and borders first.
- Use pressure-sensitive tasks if relevant: If your work depends on precision, try your usual note-taking or drawing app.
- Tap small controls: Tiny buttons reveal alignment issues quickly.
A repaired iPad doesn't need to feel suspicious. It should feel boring. That's a good outcome.
How to protect the new touch layer
Daily habits matter more than dramatic one-time precautions.
Use a solid case. Clean the glass with a soft cloth instead of whatever towel is nearby. Avoid setting the iPad down where it can flex, slide, or get knocked from a counter. If you cook with it nearby, reduce the number of direct touches when your hands are messy.
That's where an always-on cooking view helps. The Keep On Feature keeps the display on without requiring screen touch, which is useful with greasy hands and helps minimize contact with the digitizer, as described on the OrganizEat App Store listing. If you use an iPad heavily around the house, it's also worth reviewing a few free apps for iPads that suit the way families use a shared tablet.
A repaired digitizer lasts longer when you treat the iPad like a tool with one vulnerable control surface, because that's exactly what it is.
The final decision is usually less about bravery and more about honesty. If you have an older iPad, steady hands, and real repair experience, DIY may be reasonable. If your model has a fused screen, if touch matters every day, or if you'd be frustrated by troubleshooting connectors and adhesives, professional repair is usually the smarter path.
If your iPad is central to your cooking routine, recipe collection, or family meal planning, it helps to have a system that stays organized across devices even when one tablet is out for repair. OrganizEat gives your recipes a reliable digital home, from handwritten cards and cookbook pages to recipes saved from social posts and websites, so your kitchen workflow doesn't depend on one fragile screen.